Flutter is Google’s UI toolkit for building beautiful, natively compiled applications for mobile, web, and desktop from a single codebase.
Generate your Keystore
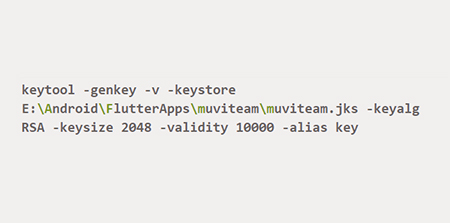
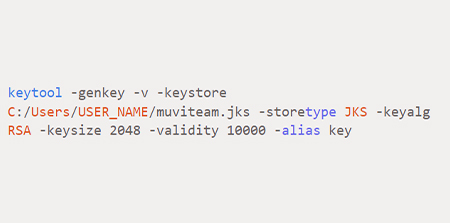
Every app needs to be digitally signed by its own keystore (a .jks file) before being uploaded to Google or Apple. When you deploy newer versions, they will use the digital signature to verify the authenticity of the upload. Therefore DO NOT lose this file and DO NOT check it into version control, keep a copy of it somewhere safe. If you lose this file, you will need to generate a new one and contact Google and Apple to get it verified. Prepare and write down a key password and store password, you will need to use this in the next step Run the following command to generate your keystore file. Make sure you replace muviteam with the name of your app in both the keystore argument and the alias argument. After running this command your file will be saved in ~ or C:/Users/USER_NAME change the directory if desired.
Run the following command to generate your keystore on Mac/Linux:
Run this on Windows (replace USER_NAME with your username):
2. Create Keystore properties file
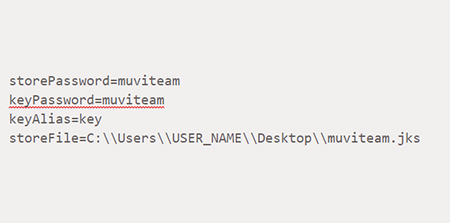
Create a new file {project-root}/android/key.properties with the following and replace each field with the details from the previous step. DO NOT check this file into version control.
3. Update build.gradle
- Set compileSdkVersion, minSdkVersion , and targetSdkVersion to 28. See the documentation for correct Android versioning.
- Open {project-root}/android/app/build.gradle
- Under defaultConfig, replace the buildTypes block with this fragment of code (use androidx.fragment:fragment:1.0.0 instead of com.android.support:support-fragment:28.0.0 when using AndroidX):
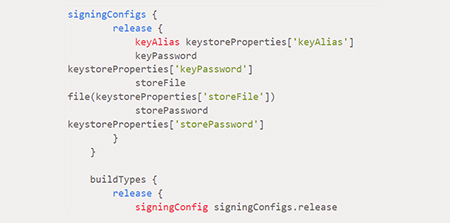
4. Add this in app/build.gradle
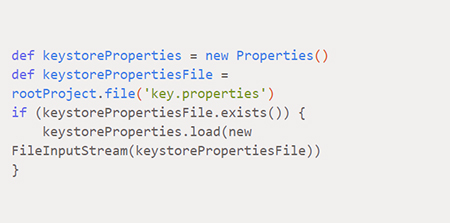
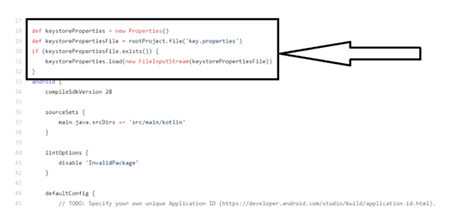
4. Update Pubspec.yaml
Open pubspec.yaml and update the version, the first part before the + sign is the version name, I recommend using semantic versioning. And increment the number after the + sign, it is the version code and if it is not updated Google/Apple could reject your APK. Please see https://flutter.dev/docs/deployment/android#updating-the-apps-version-number for more information.
Typically I like to update my version name semantically, either incrementing the major or minor number like 1.1.0 -> 1.2.0, if it has breaking changes 1.1.0 -> 2.0.0, etc. And I always increment the version number like +1 to +2.
5. Build and upload APK to Google Play
- Run this in the command line in your project root flutter clean && flutter build app bundle –release, this could take up to 10 minutes, don’t freak out.
- Login to Google Play Console
- Click on ‘Release Management’ on the left-hand side, then ‘App releases’
- Then create a new release, and fill in the details, I like to use the version name as the release name.
- Upload your appbundle files in this directory: {project-root}/build/app/output/bundle/release/app-release.aab
- Practice your Google skills to fix any issues
- Party!!!
Subsequent Deployments
- Update version name and version number in pubspec.yaml
- Run flutter clean && flutter build appbundle –release
- Go to Google Play Console -> Release Management -> Create new release
- Upload new {project-root}/build/app/output/bundle/release/app-release.aab files
- Check In changes












Add your comment