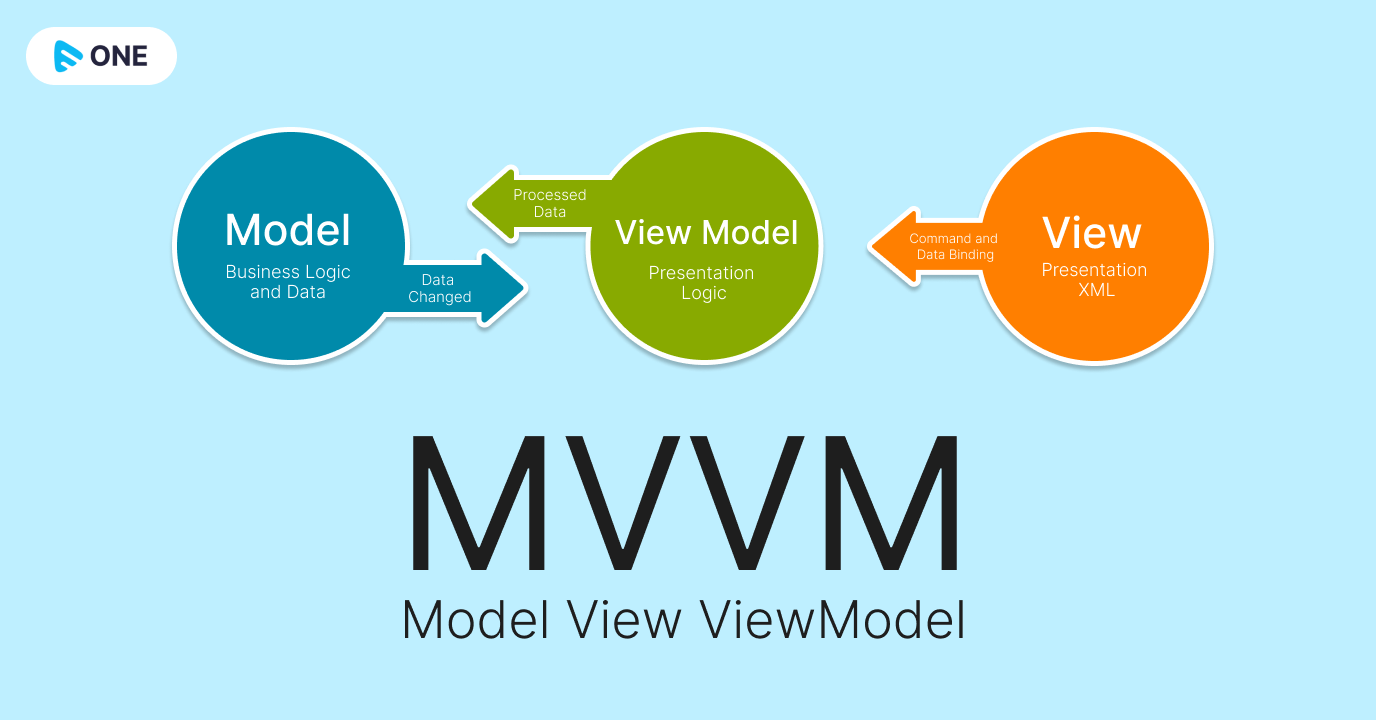
For any software development process, code structuring is an extremely important aspect. And personally, we think MVVM is the best way to structure code (in most situations).
The thing we like most about it is the compartmentalization of the various components in a project.
- The UI components are kept away from the business logic
- The business logic is kept away from the database operations
- It’s easy to read (because everything has specific places to live)
- And if done correctly, you have a lot less to worry about when it comes to lifecycle events (ex: screen rotations)
Common Problems Without MVVM
When we were not using MVVM, we often used to face issues like:
- Tight coupling of code: Even a small change in one portion of code resulted in changes/bugs in another part of the code.
- Reduced code reusability eventually led to copy-pasting lines of code.
- Unit testing was getting difficult due to the tight coupling of code.
Advantages of MVVM
We noticed three important key things after applying MVVM which are as follows.
Maintainability
- A clean separation of different kinds of code should make it easier to go into one or several of those more granular and focused parts and make changes without worrying.
- That means you can remain agile and keep moving out to new releases quickly.
Testability
- With MVVM each piece of code is more granular which makes it a lot easier to write unit tests against core logic.
Extensibility
- It sometimes overlaps with maintainability, because of the clean separation boundaries and more granular pieces of code.
- You have a better chance of making any of those parts more reusable.
- It also has the ability to replace or add new pieces of code that do similar things in the right places in the architecture.
How we use MVVM in Muvi?
When we use the MVVM pattern in the application, It allows us to reuse the codes/modules without any complications. For Ex:-
We have developed an application that supports multiple templates on top of a single code base. It allows us to have easy and quick customization on a specific template without changing the core business logic. It’s only possible when your View and Data part is completely separate. It also allows you to template switching without any hassle.
Dependencies
build.gradle app file.
def version= ‘1.1.1’
Implementation “android.arch.lifecycle:extensions:$version”
annotationProcessor “android.arch.lifecycle:compiler:$version”
Repositories
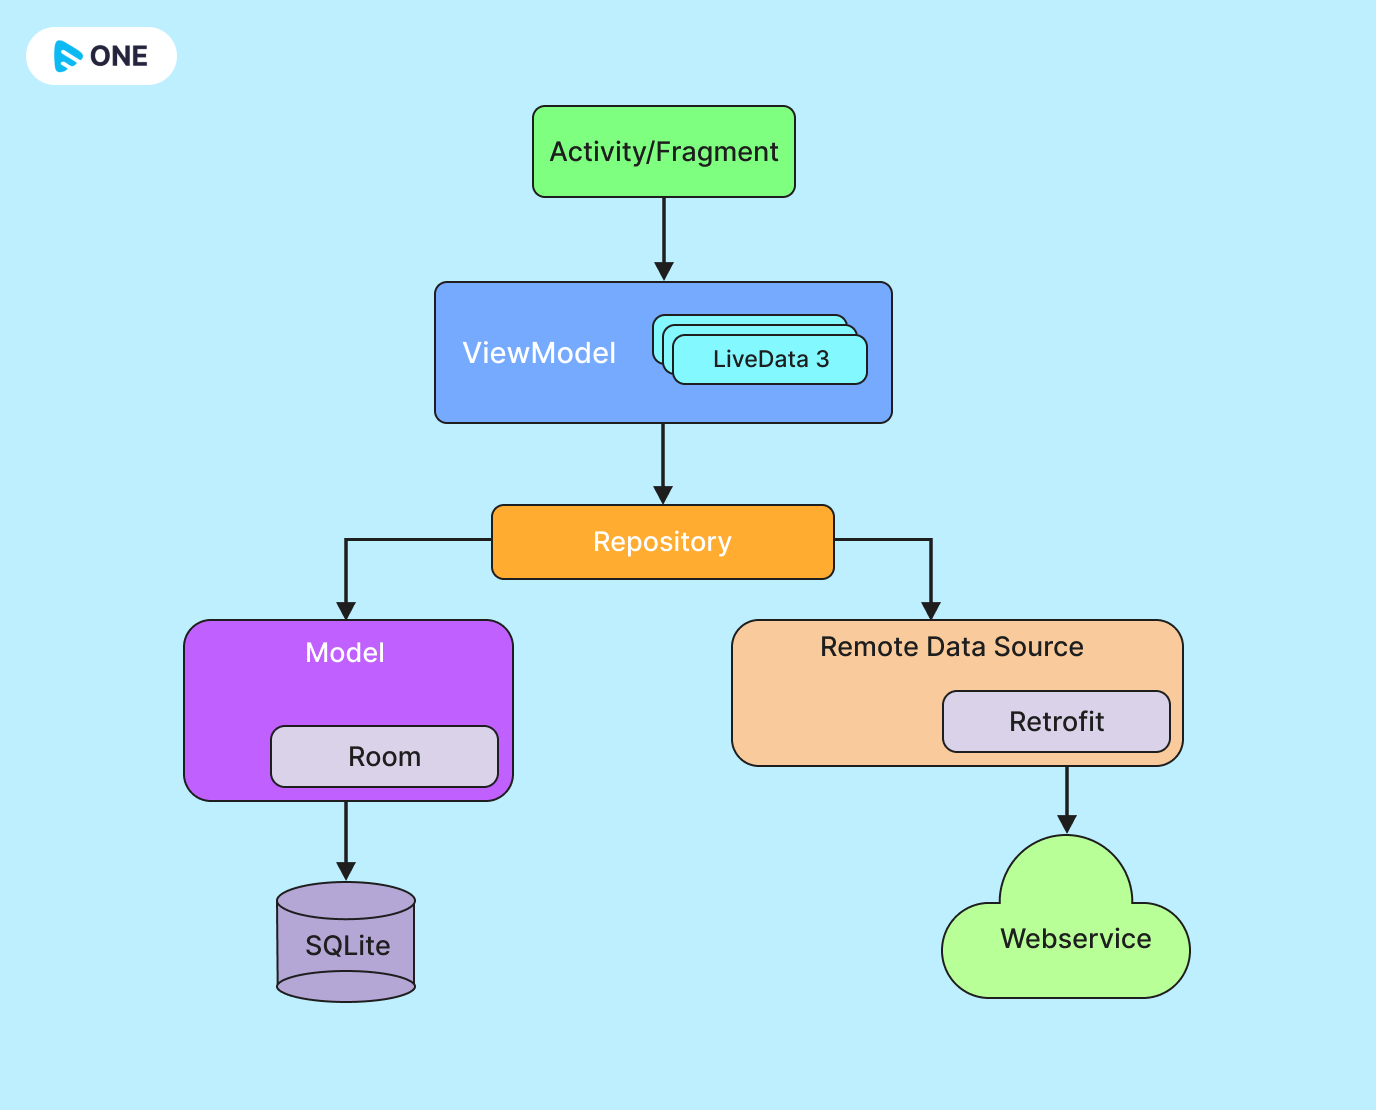
Repository classes handle data operations. Creating a repository is a clean way to provide clear distinctions between how an application retrieves data, and how it uses/displays that data.
Repositories know where to get the data from (ex: what REST API to query, what internal SQLite database to query, etc…) and what API calls to make when data is updated. You can consider repositories mediators between different data sources, such as persistent models, web services, and caches.
View Models
The ViewModel class is described perfectly by its name. It’s a model, for a view. The view can be a fragment or an activity. And the model can be anything. It’s a model for the data you want to display in the view.
A ViewModel can tell other components to retrieve data (for example a repository), and it can handle incoming requests from a user to modify the data (for example a user adding a new element to a RecycerView full of list of items).
Like a repository, a ViewModel is another form of mediation. It separates the act of retrieving or updating data sets (represented by the repository), and the current state of the UI. A ViewModel doesn’t know about the lifecycle of an activity or fragment. If a configuration change occurs, it doesn’t care. Its only concern is holding an accurate reference to the data for the view. If the user were to close the app and reopen it several hours later, they would see exactly the same thing as when they closed it.
Preparing the ViewModel
Now that you have an idea of the overall structure of this design pattern, let’s talk about how the different components communicate. How does a view (an activity or fragment) display the data represented inside the ViewModel?
This is a difficult concept to understand conceptually, so I’ll use an example.
Suppose you were constructing a ViewModel for an activity that displays a user profile. The user profile is simple, it has a profile image and 2 TextViews describing the user’s name and occupation.
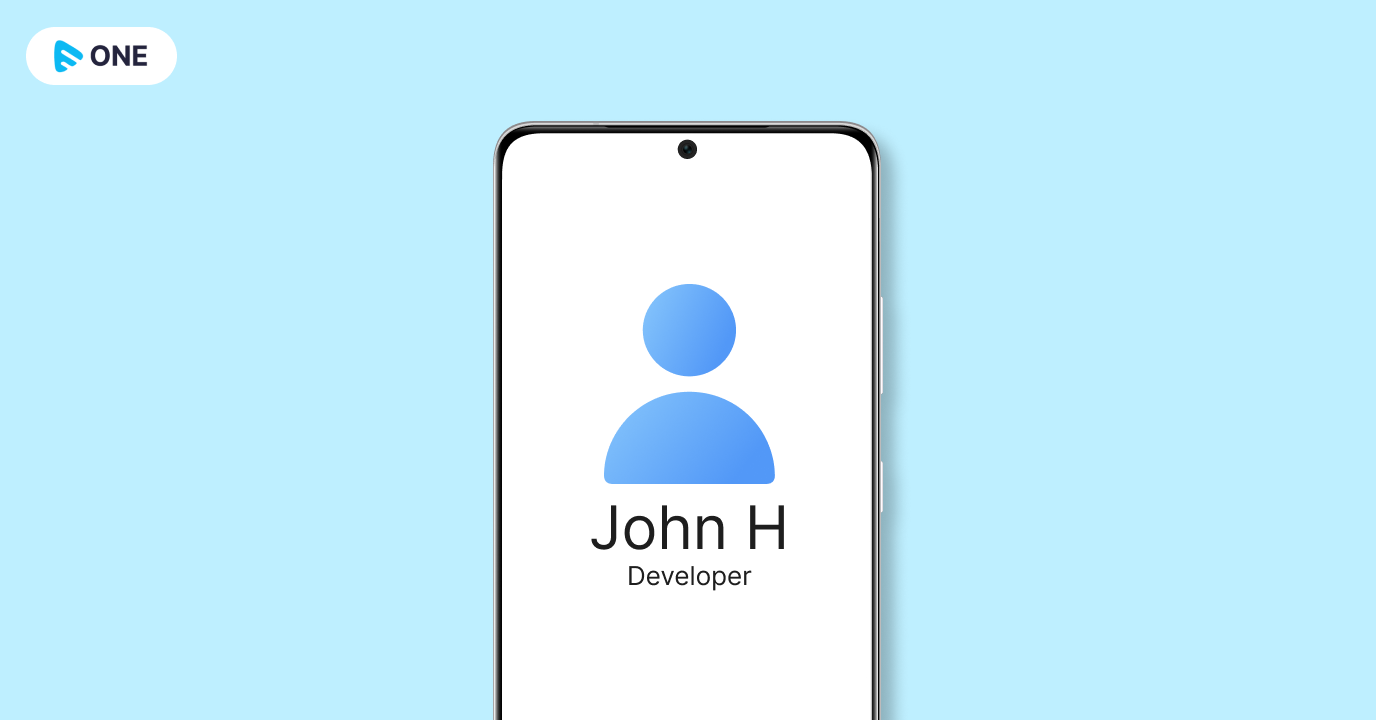
First, you’d want to build a User class to model the User object.
User.java
public class User{
private String profile_image;
private String name;
private String occupation;
// getters and setters
// …
}
Next is the ViewModel. The goal here is to display the data contained in the User model on the screen. To do that you create a new class that extends ViewModel. Inside the ViewModel is where you put the data. But you can’t just stick the User model inside the ViewModel class, it needs to live inside a special container. One type of special container you can use is a LiveData object.
A LiveData object is an observable data-holder class. It’s responsible for holding the data that are displayed in the view. But it’s not just any old data holder, the data is observable. Meaning that the data is actively being watched for changes. If a change occurs, the view is updated automatically.
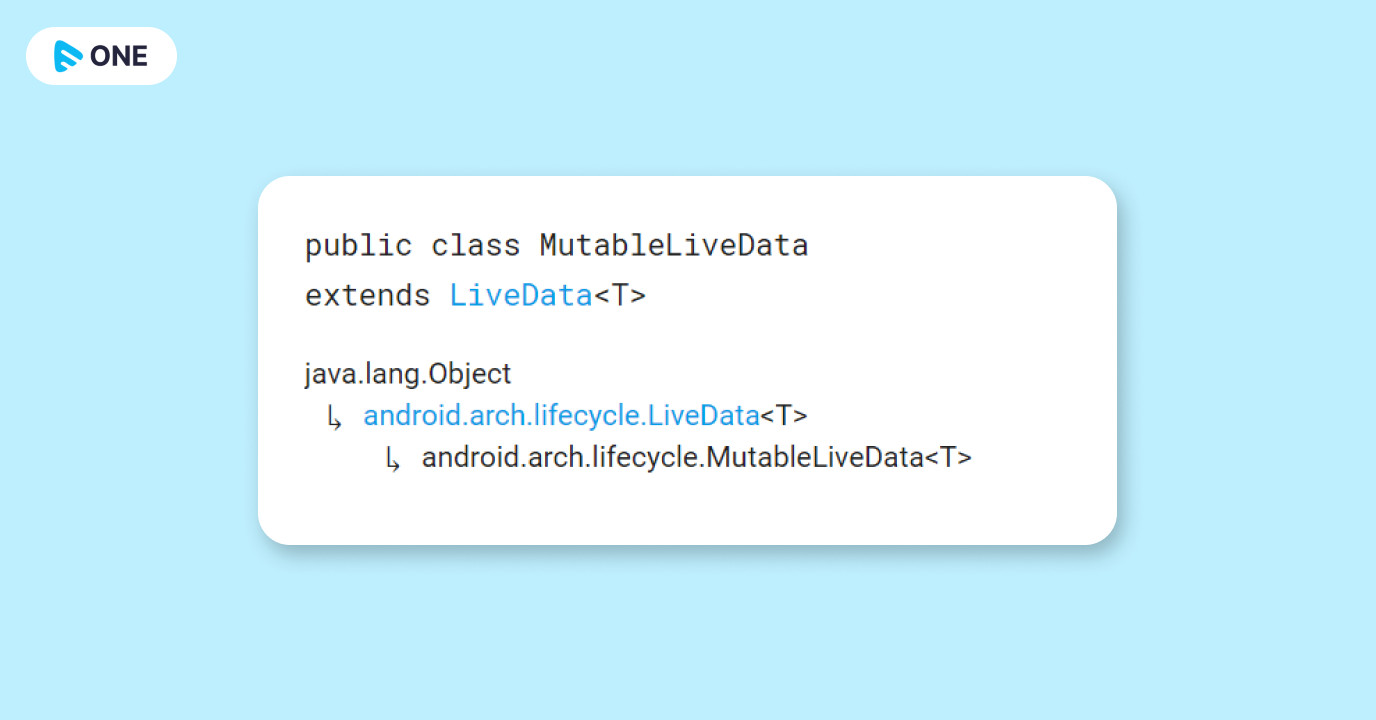
Also, notice the MutableLiveData object. MutableLiveData is a subclass of LiveData. Here’s a diagram if you’re confused:
First, notice that I’m exending by ViewModel. There are two options, AndroidViewModel and ViewModel. You want to use AndroidViewModel if you need the application context inside the ViewModel.
You need to use a MutableLiveData object if you want to allow the LiveData object to be changed. LiveData can not be changed by itself. That is, the setValue method is not public for LiveData. But it is public for MutableLiveData. I’ll talk more about this below when we make a change to the user’s name.
MainActivityViewModel.java
public class MainActivityViewModel extends ViewModel{
private MutableLiveData<User> user;
public LiveData<User> getUser() {
return user;
}
}
Now if any changes are made to the LiveData object (which is representing a User object), the view will be updated with the correct data automatically. Also, note that a ViewModel will not be destroyed if its owner is destroyed for a configuration change (the owner being the activity or fragment it exists in). The new instance of the owner will just be re-connected to the existing ViewModel. So if the user locks the phone screen and comes back several hours later they’re still going to see the exact same thing.
Communicating Between Activity and ViewModel
The next step is associating the ViewModel with the activity or fragment that it’s designed for.
Start by creating a global ViewModel object. You want to create a global object so the user can make changes to the ViewModel easily. For example, if they wanted to change their name. I’ll talk more about that in the section below named “Communicating with a Repository”.
MainActivity.java
public class MainActivity extends AppCompatActivity{
private MainActivityViewModel mMainActivityViewModel;
private ImageView mProfileImage;
private Textview mName;
private TextView mOccupation;
// …
}
Now comes the actual associating of the ViewModel with the Activity or Fragment:
MainActivity.java
@Override
protected void onCreate(Bundle savedInstanceState) {
super.onCreate(savedInstanceState);
super.onCreate(savedInstanceState);
setContentView(R.layout.activity_main);
mProfileImage = findViewById(R.id.image);
mName= findViewById(R.id.name);
mOccupation= findViewById(R.id.occupation);
mMainActivityViewModel = ViewModelProviders.of(this)
.get(MainActivityViewModel.class);
}
And finally, call the “getUser” method on the MainActivityViewModel and observe the changes:
MainActivity.java
@Override
protected void onCreate(Bundle savedInstanceState) {
super.onCreate(savedInstanceState);
setContentView(R.layout.activity_main);
mProfileImage = findViewById(R.id.image);
mName= findViewById(R.id.name);
mOccupation= findViewById(R.id.occupation);
mMainActivityViewModel = ViewModelProviders.of(this)
.get(MainActivityViewModel.class);
mMainActivityViewModel.getUser()
.observe(this, new Observer<User>(){
@Override
public void onChanged(User user) {
// Set profile image
mName.setText(user.getName());
mOccupation.setText(user.getOccupation());
}
});
Retrieving Data in the Repository
The repository is designed to supply up-to-date data to the ViewModel. But how does the repository actually aquire that data? In the case of a REST API, the repository would need to make a request to a server using something like HTTP. In the case of a local SQLite database, the repository would simply query the database on the phone.
Here’s an example of what a repository might look like querying a server for user data given a specific userId. Keep in mind this is just an example. In your actual project, you’d want to create an instance/singleton object for accessing a web service (Like an application-wide singleton instance of Retrofit for example). If a different instance was used inside each and every ViewModel, your application would almost certainly start to struggle.
UserRepository.java
public class UserRepository {
private static UserRepository instance;
public static getInstance(){
if(instance == null){
instance = new UserRepository();
}
return instance;
}
private WebService mFakeWebService =
WebService.getInstance();
public LiveData<User> getUser(String userId) {
final MutableLiveData<User> userData =
new MutableLiveData<>();
userData.setValue(
mFakeWebService.getUser(userId)
);
return userData;
}
Pay close attention to how I’m using the MutableLiveData object here. In the getUser(String userId) method I’m instantiating a new MutableLiveData object, setting the value using the setValue(mFakeWebService.getUser(userId)) method, then returning the MutableLiveData object. Remember, I’m doing this because a LiveData object does not have a public setValue method, so we need to set the data using a MutableLiveData object.
Communicating with a Repository
The next step is telling the repository to retrieve the data. Once it’s retrieved, the LiveData object will get updated, resulting in the onChange method being called in the Observer. Recall onChange from MainActivity:
MainActivity.java
mMainActivityViewModel.getUser()
.observe(this, new Observer<User>(){
@Override
public void onChanged(User user) {
// … setter methods
}
});
To initiate the query in the repository we need to create a new method in the ViewModel class. Here’s an example of retrieving data from the repository in the ViewModel. Notice I’m using an instance of UserRepository to call the getUser(String userId) method.
MainActivityViewModel.java
public class MainActivityViewModel extends ViewModel{
private MutableLiveData<User> user;
private UserRepository userRepo;
public void queryRepo(String userId) {
userRepo = UserRepository.getInstance();
user = userRepo.getUser(userId);
}
public LiveData<User> getUser() {
return user;
}
}
Now call the queryRepo(String userId) method in MainActivity:
MainActivity.java
@Override
protected void onCreate(Bundle savedInstanceState) {
super.onCreate(savedInstanceState);
// …
mMainActivityViewModel = ViewModelProviders.of(this)
.get(MainActivityViewModel.class);
mMainActivityViewModel.queryRepo(“someUserId”);
mMainActivityViewModel.getUser()
.observe(this, new Observer<User>(){
@Override
public void onChanged(User user) {
// …
}
});
}
That will take care of the query. At this point, you’ll see data in the Activity.
Updating LiveData Values
Suppose the user wanted to update the name field in their profile. This is what you’d need to do. First, we need a method in the ViewModel for updating the user object.
MainActivityViewModel.java
public class MainActivityViewModel extends ViewModel{
private MutableLiveData<User> user;
private UserRepository userRepo;
// …
public LiveData<User> getUser() {
return user;
}
public void updateUser(User updatedUser) {
user.postValue(updatedUser);
}
}
Then in MainActivity, you set the new value after capturing the new input.
MainActivity.java
updatedUser.set(newName);
mMainActivityViewModel.updateUser(updatedUser);












Add your comment