Let me ask you one simple question. Suppose you need to develop a complete website and deploy it within a single day, what will you do? I am sure most of you will start your laptop, go to the browser, and start developing your website on WordPress! Right? That is why over 35% of the total number of websites present on the internet today are WordPress sites. But, many WordPress developers face issues while embedding videos in WordPress.
In this blog, we will discuss the easiest way to embed video in WordPress, but before that, let’s take a look at the benefits of adding videos to your website. So, let’s begin!
Benefits of Adding Videos to WordPress Sites
SEO experts say that adding videos to your website can do wonders for your business. In terms of search engine rankings, website traffic, bounce rate, reading time, and all the other aspects, videos will help you by leaps and bounds. Let’s take you through some of the most obvious benefits of adding videos to your website in detail:
- With videos, your customers understand clearly what you have to offer, and they engage with your products more keenly
- If you sell your products through your website, your videos can do a great job of impressing your customers
- Statistics say that interesting videos keep your viewers engaged for a longer period of time. Hence, they spend more time on your website, hence increasing the average reading time
- Also, you can attach multiple CTA links to a video. These links often attract more clicks as compared to the normal CTAs, hence increasing your number of leads and decreasing the bounce rate of your website
- Videos can explain very complex topics very easily, and they deliver more content in less time
Due to all these benefits, videos make your website extremely user-friendly. Thus, Google gives a better rank to your website, thus making it more discoverable. With more eyeballs falling on the top-ranking sites, it is most likely that viewers will get to visit your site more often.
But, we all know that embedding videos correctly into your wordpress site is not that easy. We often face many difficulties while uploading videos in wordpress. Let’s discuss some of the most commonly faced issues in our next section.
Difficulties That Users Usually Face While Uploading Videos in WordPress
So, first things first, you must know that there is a clear difference between uploading a video in WordPress and embedding a video in WordPress. When you upload a video, you actually add that video to your WordPress media library. It means that whenever your user will see your video, they will stream it from your internal server. It can lead to many issues. It may increase your website’s loading time, making it very slow and irritating for your consumers. Also, it will take up a lot of storage space in your server, making your website very bulky, which will in turn make it glitchy!
So, what’s the way out? Firstly, you can embed a video from a third-party site like YouTube to your website, and secondly, you can use a specialized WordPress plugin for embedding and uploading videos to wordpress. Which one of the two should you choose? Let’s explore!
If you are embedding a video, you will definitely be able to reduce some of the issues. Like, the embedded videos will not take much memory in your server, hence keeping your website lighter than usual. But will it solve all the problems? The answer is no.
Because embedding videos have its own set of risks. Like, many times, the embedded videos might not get loaded correctly, leading to either a blank space or an error message in place of the video. Thus, embedding videos to your website at times may lead to no videos at all!
So, what’s the ultimate solution to all these problems? Keep reading to know!
Introducing One-Stop-Solution to All Your Issues: The MUVI Media Connect WordPress Plugin
MUVI Media Connect is Muvi’s all-in-one WordPress plugin, that brings MUVI’s audio and video capabilities to WordPress sites. And using it is super easy! You just need to have a MUVI account, and that’s it! You can embed any video from your MUVI CMS into your WordPress website. Isn’t it amazing? And it has many added benefits too!
Once you successfully enable the MUVI Media Connect plugin on your WordPress, you can seamlessly upload the audio and video from your MUVI CMS, without worrying about their processing. Muvi will take care of everything related to audio and video processing. Hence, you don’t need to worry about the size of the video, the speed of the video, or the memory that it will consume. Just add it to your website and relax!
Want to know how you can use our WordPress plugin to add videos to your website? Keep reading the blog to know the steps by which you can do so!
Steps To Embed Videos Into WordPress Using MUVI WordPress Plugin
In order to enable the MUVI WordPress plugin, you first need to create a MUVI account. So, click here to sign up and start your 14-day free trial. Your MUVI account comes with an in-build AWS CDN and CMS that will act as the primary depository and control center of your videos. And, this is the case if you are not in the OTT business. If you are an OTT platform, then you can use MUVI to develop your own OTT platform without writing a single line of code!
In case you are already a MUVI customer, you will not have to sign up again. You can use your existing MUVI account to embed videos through MUVI Media Connect.
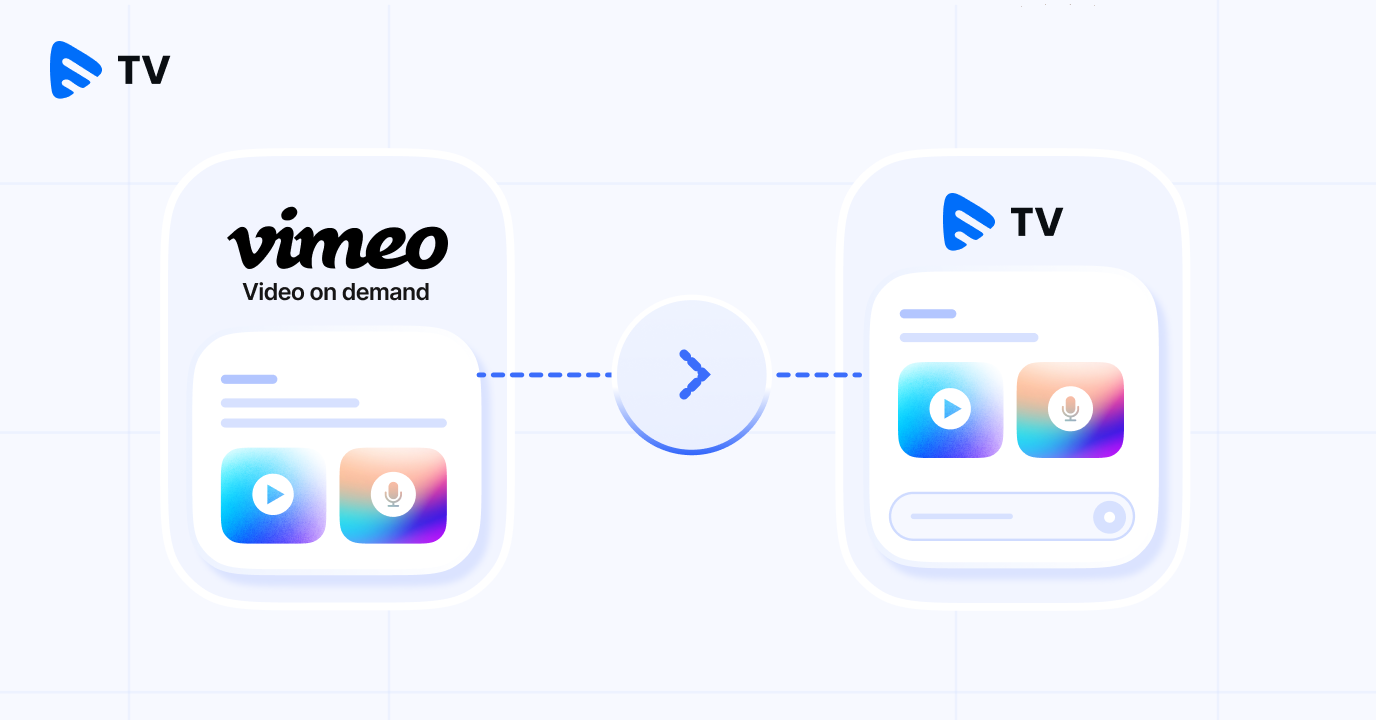
Once your MUVI account is all set, it’s now time to integrate MUVI Media Connect into your WordPress account! The overall flow is described in the flowchart below.
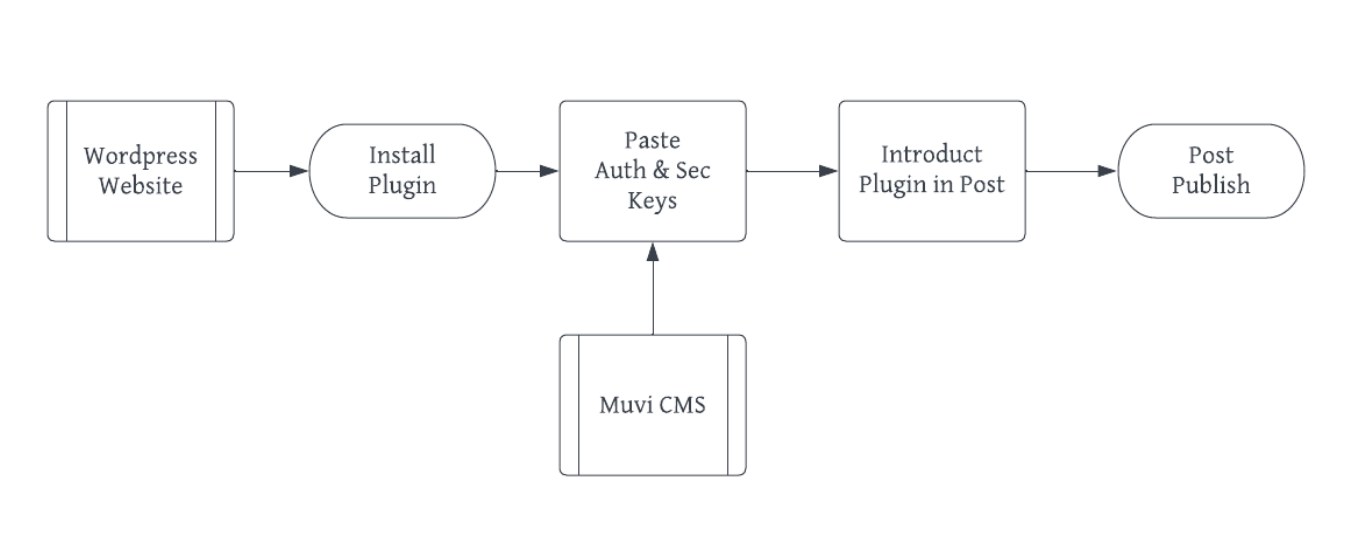
So, follow the steps given below, integrate our plugin onto your website, and integrate videos seamlessly!
- Enter your WordPress dashboard, and go to the “Plugins” section.
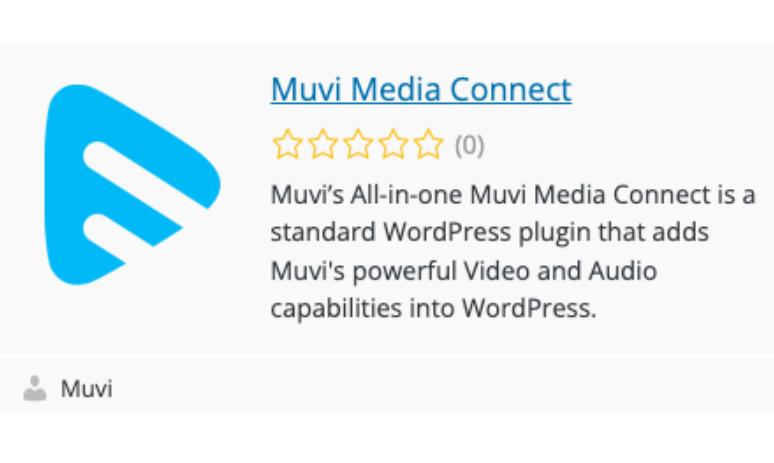
- In the Plugins search bar, search for “MUVI Media Connect”. The following Plugin will appear on your screen:
3. Download the Plugin into your WordPress account.
4. Once the Plugin is downloaded and enabled, it will appear as an icon on the top of the sidebar of your WordPress dashboard.
5. Once you see the icon on the sidebar, as shown above, click on the icon to enter the settings page.
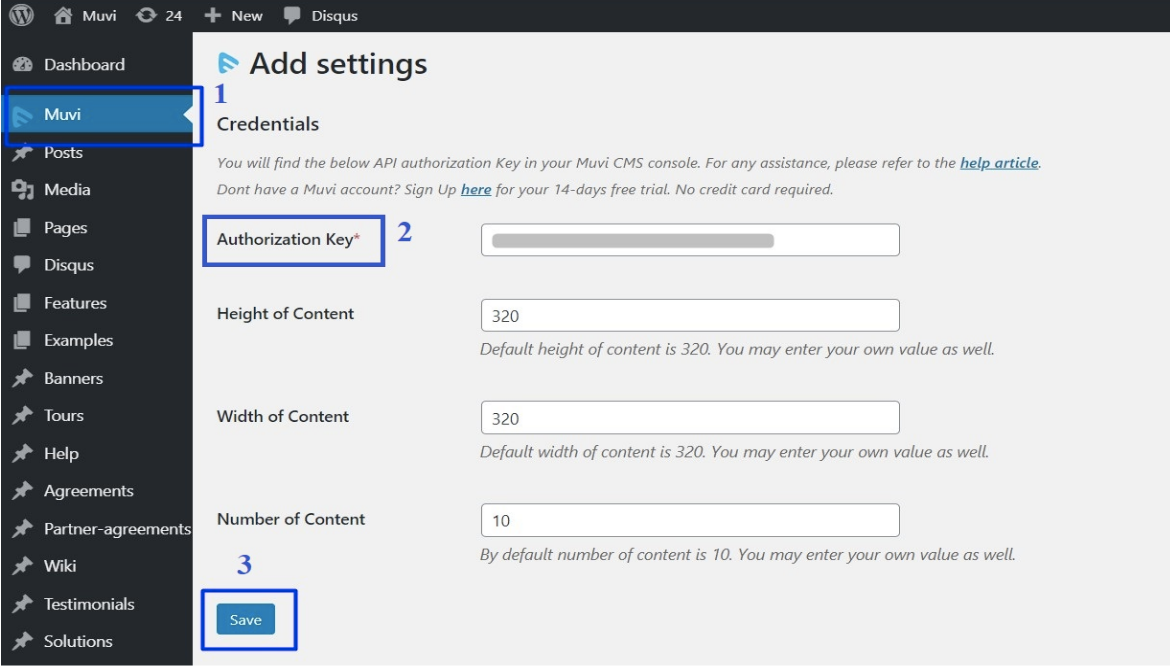
6. On this page, you will have to put the Authorization Key of your MUVI Account. You will get the Authorization Key from your MUVI CMS. This authorization key will act as a bridge between your MUVI CMS and your WordPress Plugin. This key will appear as an App ID key under Advanced Settings of your MUVI CMS.
7. Once you fill in the authorization key, add all the other details as per your requirement, like the height of your videos on your website, the width of your videos, and the number of content. Once you are done, save the settings. Your MUVI Media Connect plugin will now get activated for your WordPress account.
8. Next, it’s time to upload videos into your post. So, click on “Add New Post” on WordPress.
9. In the content editing page, whenever you will go to upload any media content (audio or video), the MUVI Media Connect plugin will appear as an option to choose from.
10. You just need to select the plugin, and enter the audio and video library.
11. From the library, choose the audio or video that you want to embed into your post.
12. Your video will get embedded into the post successfully!
Wrapping Up
Uploading or embedding videos into WordPress often involves loads of issues, like increasing the site loading time and making the site glitchy. But by using the MUVI Media Connect WordPress plugin, you can easily get rid of all those issues. You just need to activate the plugin, embed the video into your post using this plugin, and enjoy seamless video integration into your website.
So, if you are already a MUVI customer, download our WordPress plugin today! And if you are not on MUVI yet, then let me tell you that you are missing out on a golden opportunity to create and deploy your own OTT platform in a jiffy! Don’t lose out on this massive opportunity to develop a complete OTT platform packed with 100+ in-built features and applications in 16+ OS environments. Sign up to start your 14-day free trial today!


Add your comment