Managing user generated content for Muvi end-users may seem a bit complex initially, but by knowing the detailed steps and the purpose of each one it can be done easily! Muvi’s “User Generated Content” feature allows its end-users to upload their own content to the store from their website/mobile apps.
End-users can add content, upload video, edit content, and share the embed link of the content. And then in the CMS the admin can “Approve the Content”, edit and/or delete the content that has been uploaded by the users. Once the content is uploaded by the end-user, the monetization methods set in the CMS by the store admin will be applied to the end-user’s content by default.
How End-Users Can Upload Content?
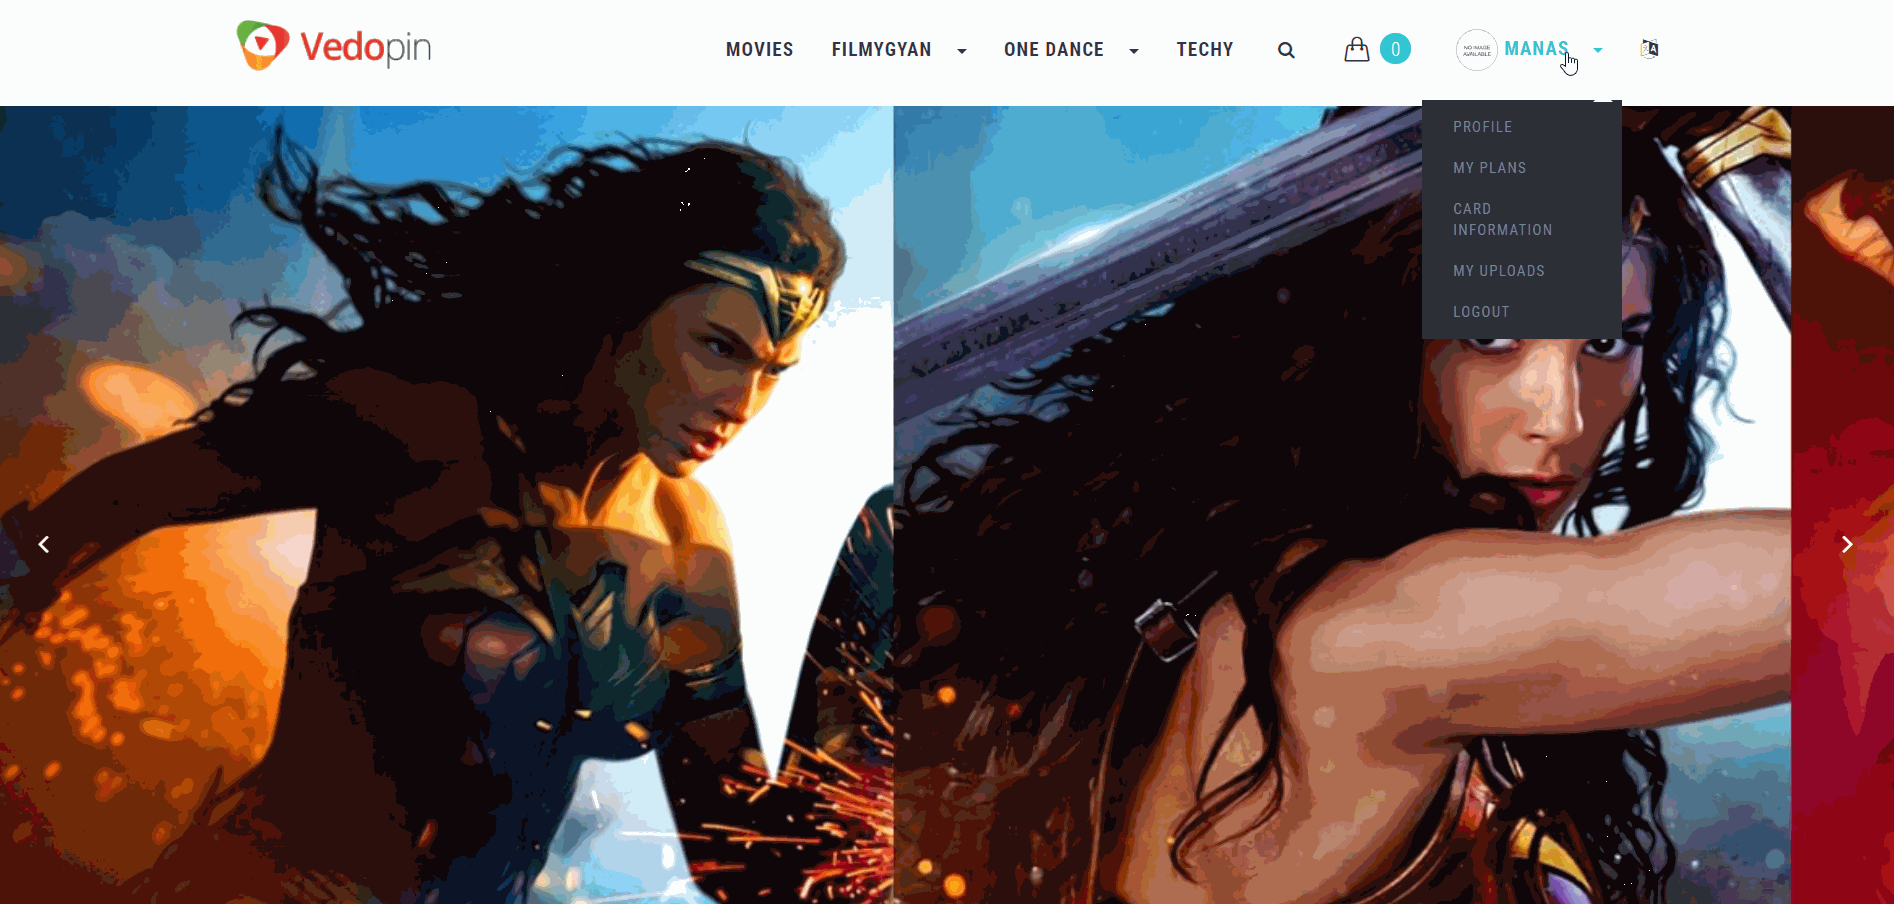
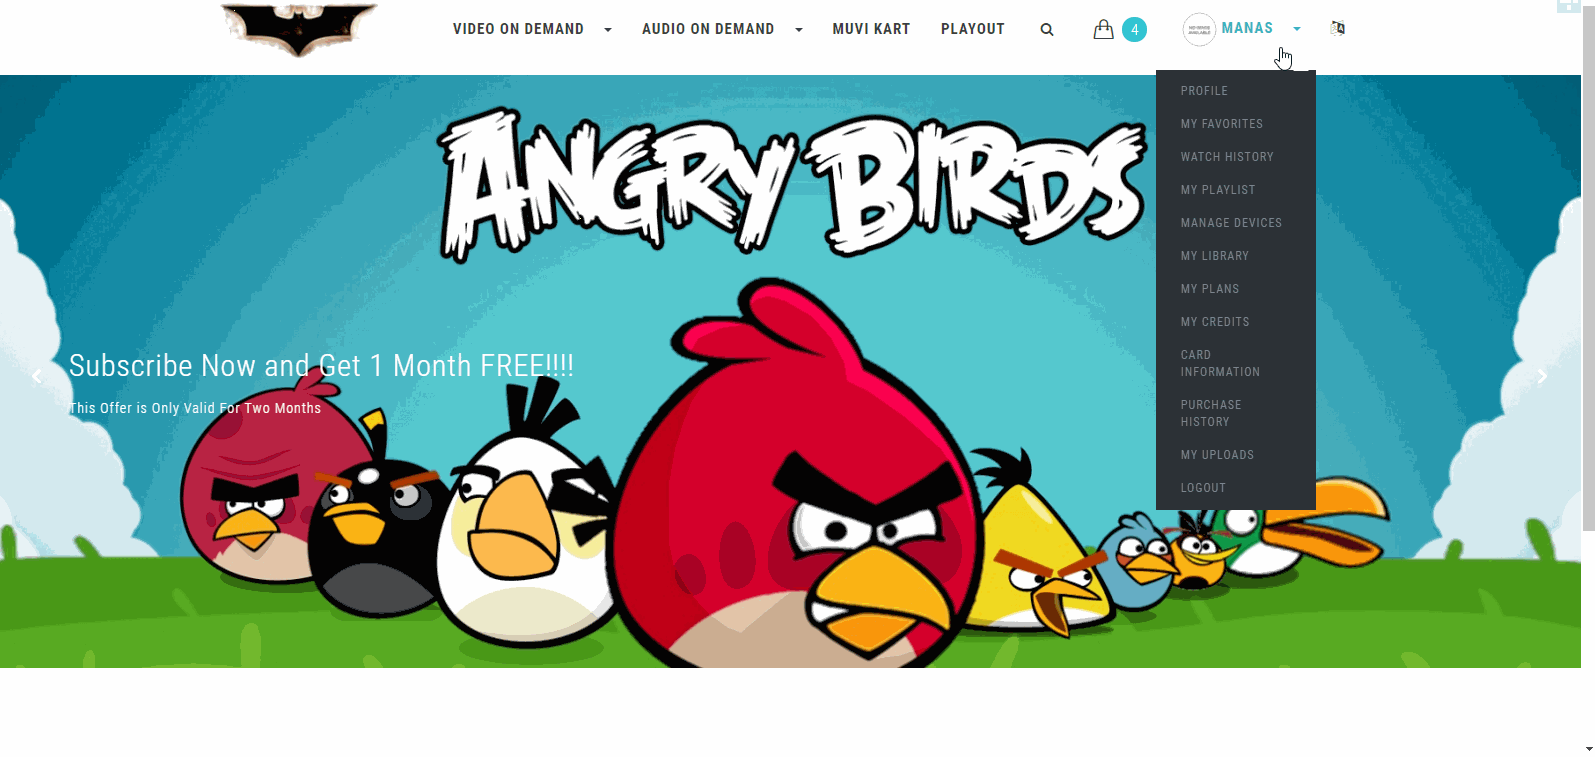
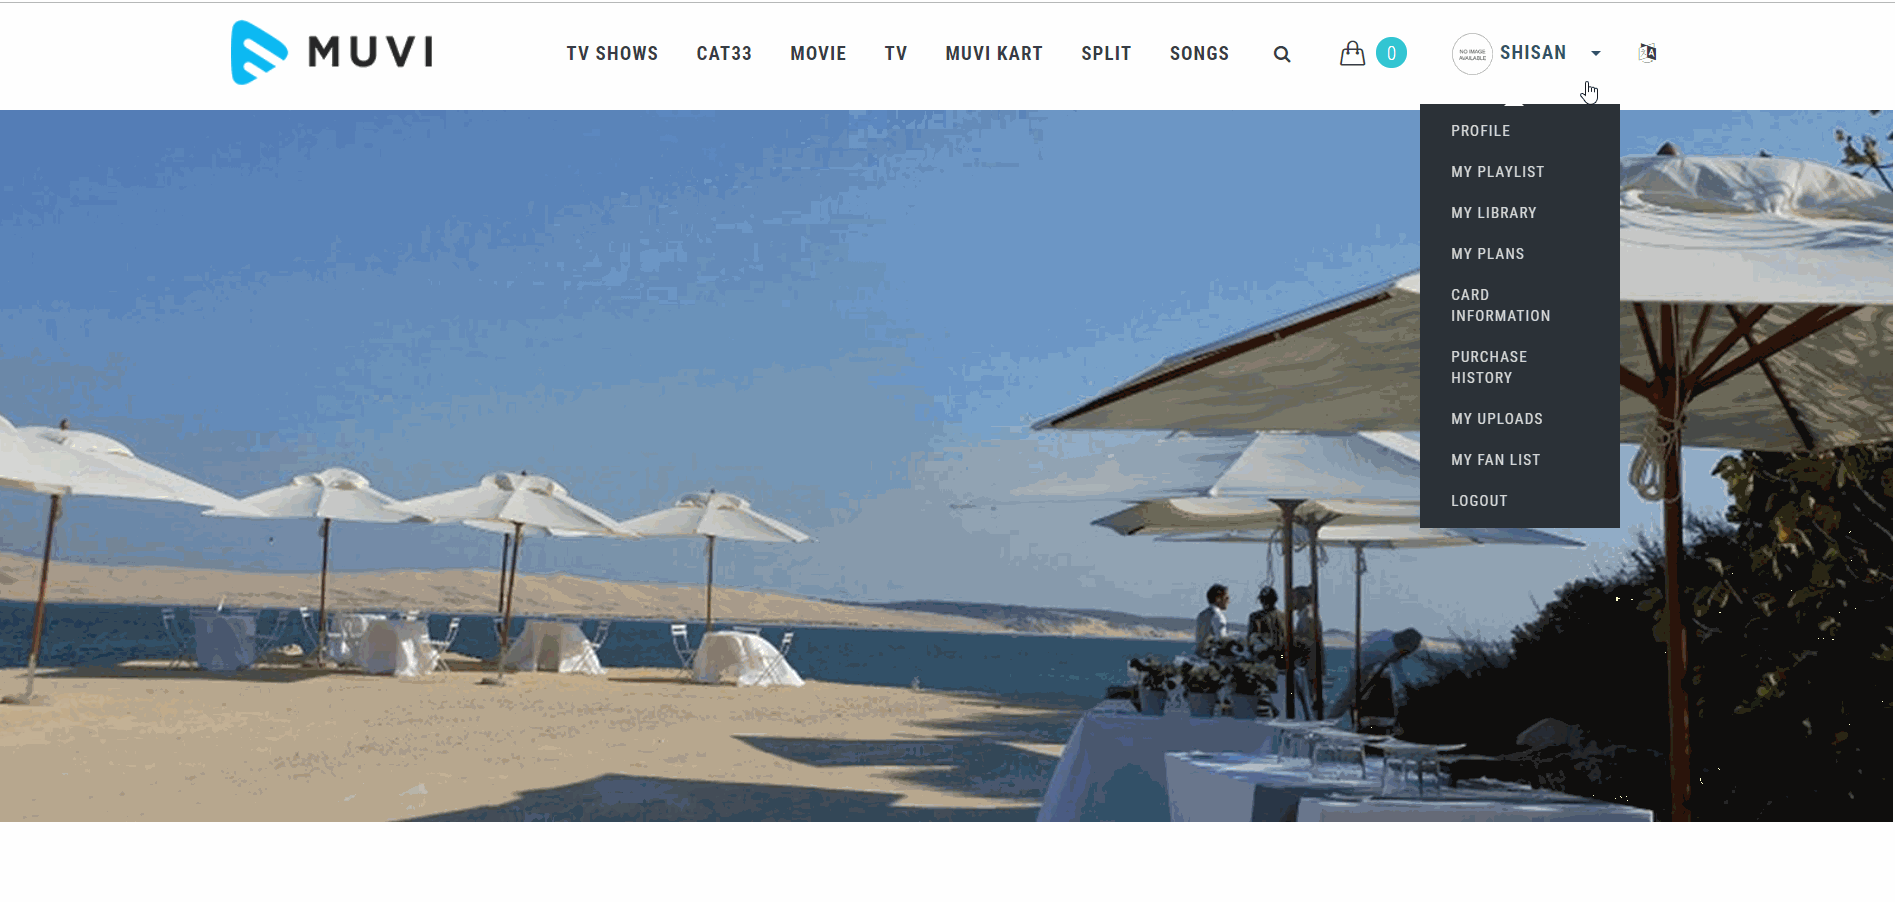
The end-users can see an option “My Uploads” under the profile menu after they login to a website. And then they need to click on “My Uploads” under the profile menu. Under “My Uploads”, they have to click on “Add Content”.
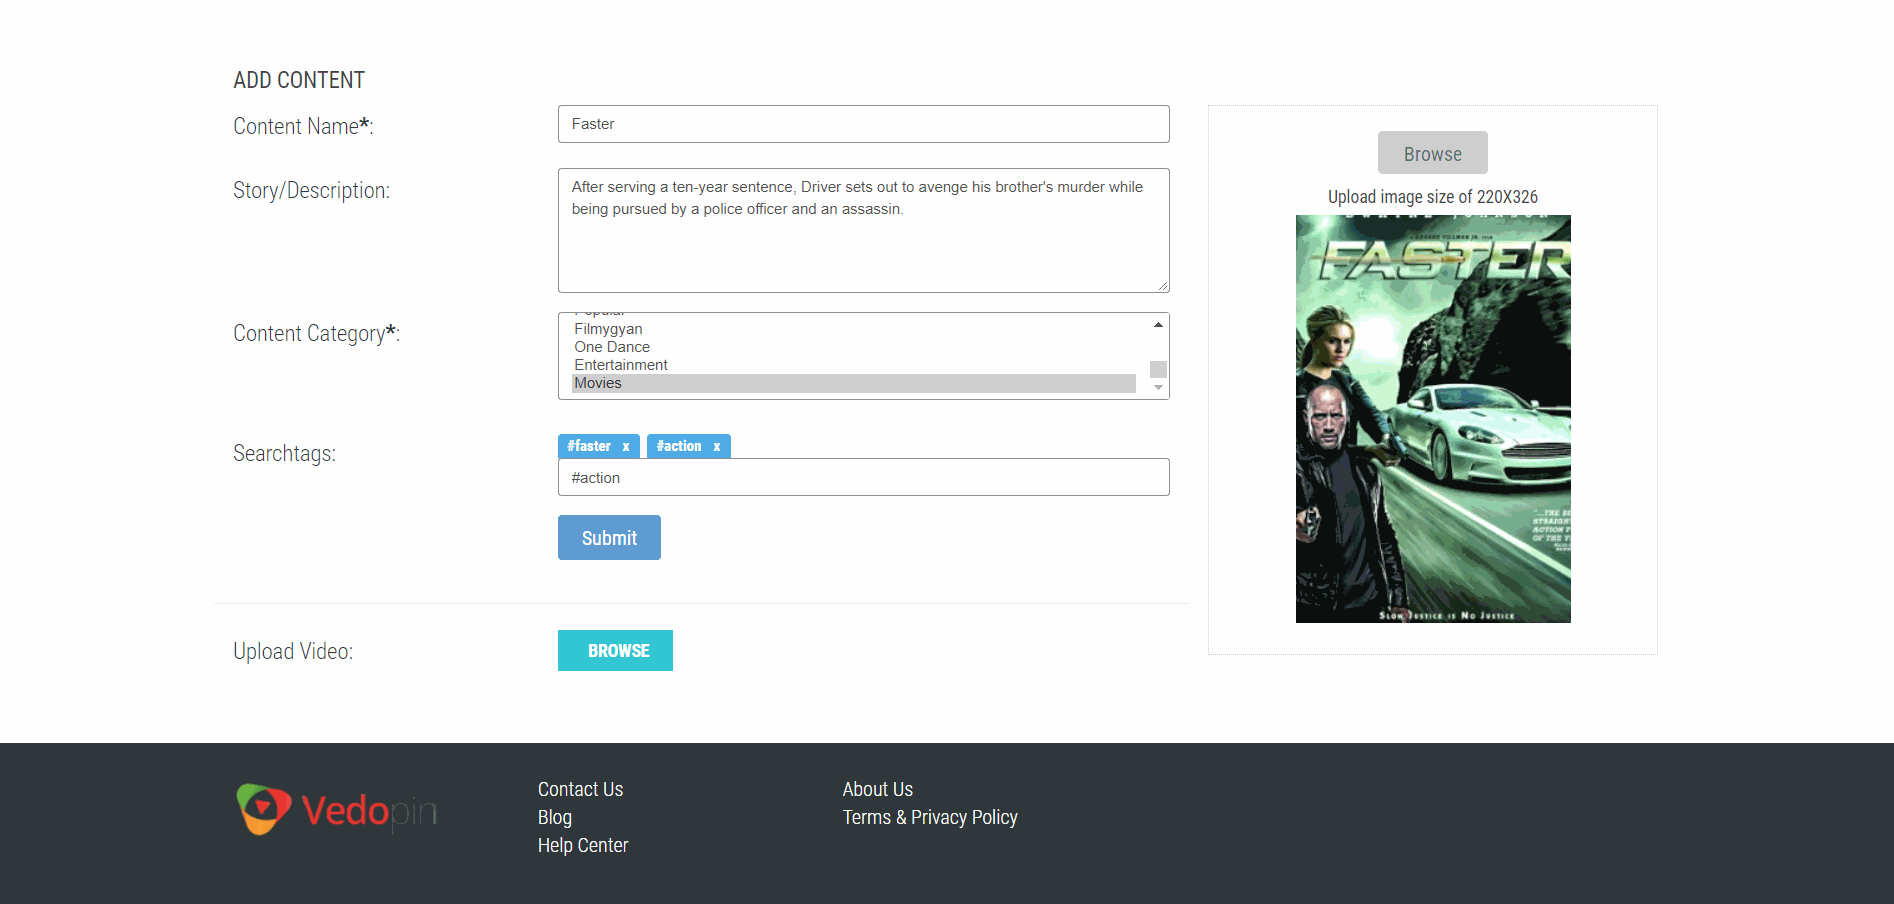
And then the process is simple! Just type “Content Name”, type “Story/ Description” about the content, select “Content Category” from the drop-down, add “Search Tags” in the corresponding field. These search tags will help users find the content easily by typing the tags in the search bar. You can use words related to the content as search tags.
To complete your content uploading perfectly-
- Upload a “Poster” for the content
- Click on “Save & Continue”
- You will get a popup that the content has been successfully added and you need to click on “OK”
- End-users need to click on “Browse” to upload a video from their computer
- Once the video is uploaded, it will be automatically mapped to the content and then start “Encoding”. The content will be available on the website once the encoding is finished.
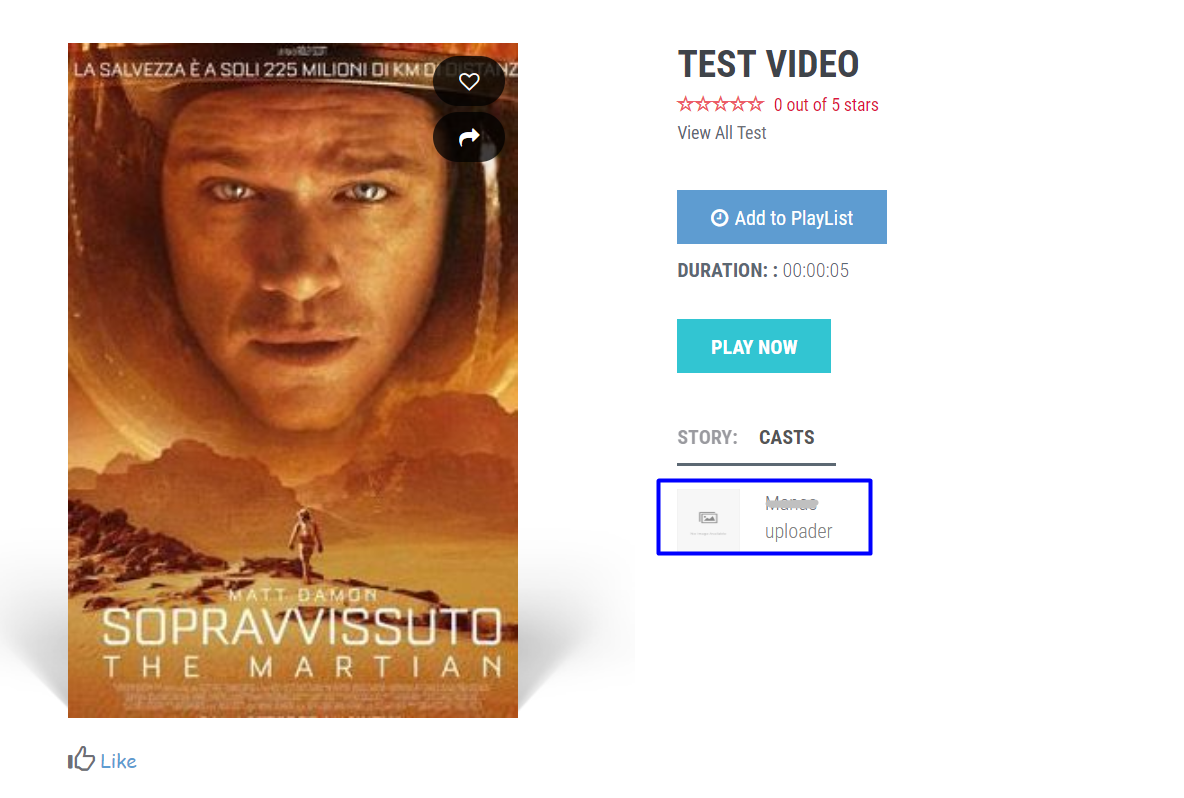
- Once the content is uploaded by the end-user, the end-user’s name will be shown as “Casts” in the content details page!
How to Upload Content via Mobile App?
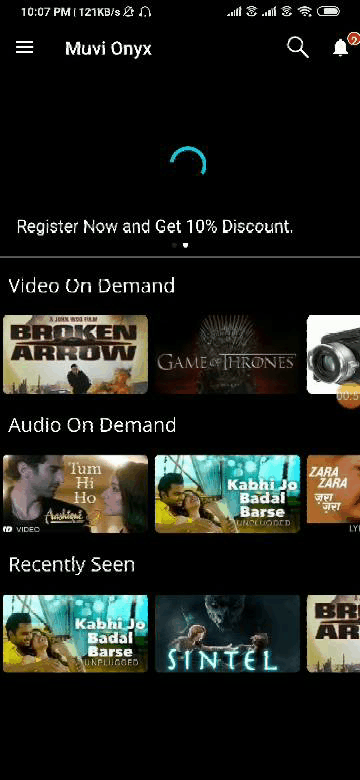
End-users can easily upload content via their mobile devices as and when they want using their mobile apps (Android, iOS).
Just follow these steps-
- First login to your mobile app
- Click on “My Upload” on the menu
- Click on the “+” icon to add content
- Type “Content Name”
- Type “Story/ Description” about the content
- Select “Content Category” from the drop-down
- Upload a “Poster” for the content
- You can upload the “Top Banner”
- Click on “Save & Continue”
- You will get a confirmation message that the content is created successfully, and you need to click on “Yes” to upload the video
- You need to click “Browse Video” to browse and upload the video from your mobile device
- Once the video is uploaded it will be encoded and then published in your store
How End-Users Can View & Manage Content?
Once the store owner approves the content, it will be available on the website. End-users can view the content by searching for it in the search bar or clicking on the content category which is assigned to the content. You can easily view your uploaded content under “My Uploads”. Just keep in mind the following steps-
- To view the content you need to click on it
- To make any changes to the content, you need to click on “Edit Content”
- You can also share the embed link of the content by clicking on “Embed Content” and then can copy the embed URL and share it anywhere you want
- You can upload a new video for the content by clicking on “Change Video”
How to Check the Fan Report for Your Uploaded Content?
You can easily check the fan reports for your uploaded content by clicking on “My Fan List” under your profile. A fan report shows-
- The name of the fan
- Email of the fan
- Number of content watched by the fan
- Number of view of the uploaded content
- Total number of likes for the uploaded content
- Number of comments received for the content
You can also download the fan report in Microsoft Excel format by clicking on “Download CSV”!
Wrapping Up,
As you can see, content management for end-users is quite simple for Muvi and you can do it easily even without any technical knowledge. Furthermore, your content always gets reviewed from the admin side to ensure no further complications arise! All you need to do is follow the simple steps as mentioned above!
If you are yet to stream with Muvi, sign up for a 14-day free trial now!


Add your comment