In modern software development, managing multiple Java projects often requires using different Java Development Kit (JDK) versions to meet specific project requirements. Whether you’re dealing with legacy applications that rely on older JDKs or cutting-edge projects optimized for the latest Java features, ensuring seamless compatibility across your Jenkins CI/CD pipelines is crucial.
At Muvi, where we continually strive to deliver world-class streaming solutions, managing diverse environments is a critical part of our development process. One of the challenges we’ve encountered is configuring Jenkins to use separate JDK versions for different jobs without introducing complexity or inconsistencies.
This blog will walk you through how to set up and configure multiple JDKs in Jenkins, enabling you to streamline your development workflows and adapt to diverse project needs effortlessly. Whether you’re a developer, DevOps engineer, or team lead, this guide will help you unlock the full potential of Jenkins for managing multi-version Java builds.
What is Jenkins?
Jenkins, a popular automation server, is highly versatile, but its compatibility with different Java versions can sometimes pose challenges. While the latest Jenkins versions support a range of Java versions, older projects or specific requirements may necessitate the use of older JDKs. The Maven Toolchain plugin offers a solution to this problem, allowing you to configure multiple JDKs and use them as needed for your Maven builds.
How To Manage Multiple JDK Versions in Jenkins Environment?
In this section, we’ll explore the practical steps to set up and manage multiple JDK versions in Jenkins, ensuring your development pipelines stay efficient and adaptable.
Step 1: Install the desired JDK version
Install the JDK version required for the particular Jenkins job to run on. Let’s say Job ‘A’ is required Java 15 and Job ‘B’ is required Java 21 to run. Install both the JDKs.
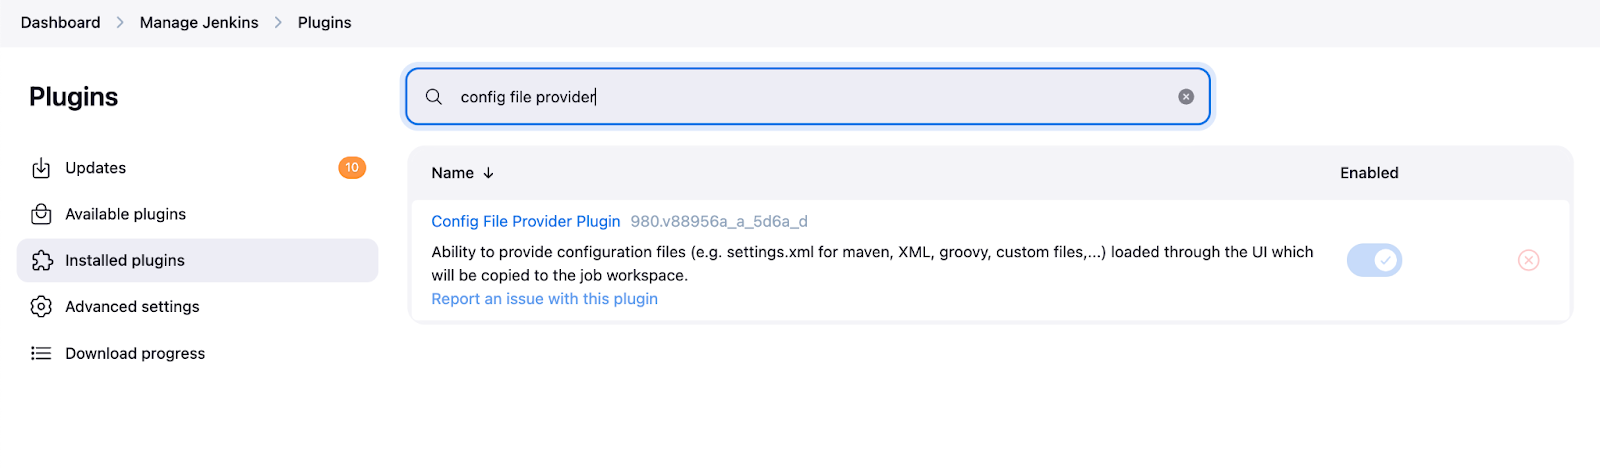
Step 2: Install the config file provider plugin
Go to Manage Jenkins > Plugins > Search for Config File Provider Plugin > Install the plugin.
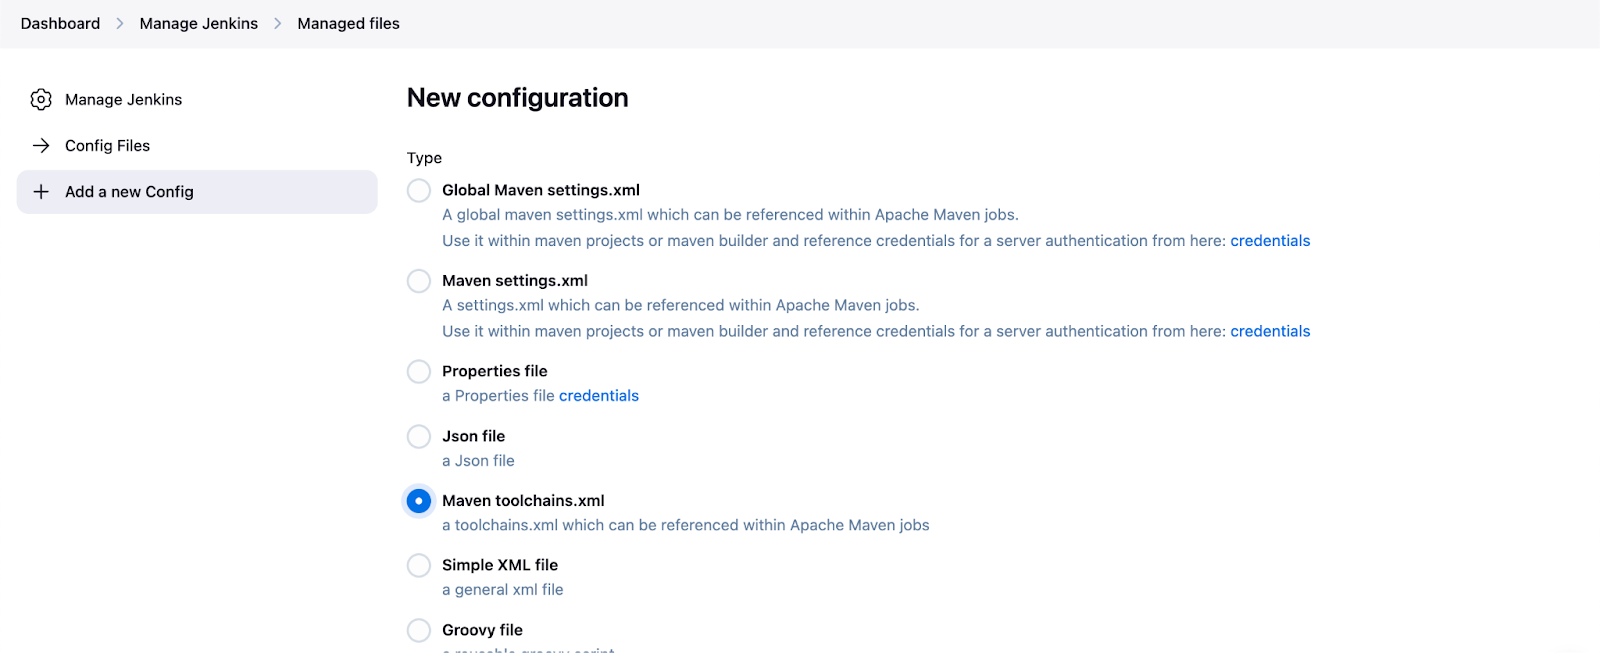
Step 3: Create a toolchain XML file
Go to Manage Jenkins > Managed Files > Add a new Config > Select Maven toolchains.xml > Provide the desired JDK version and path > Name the config file and save.
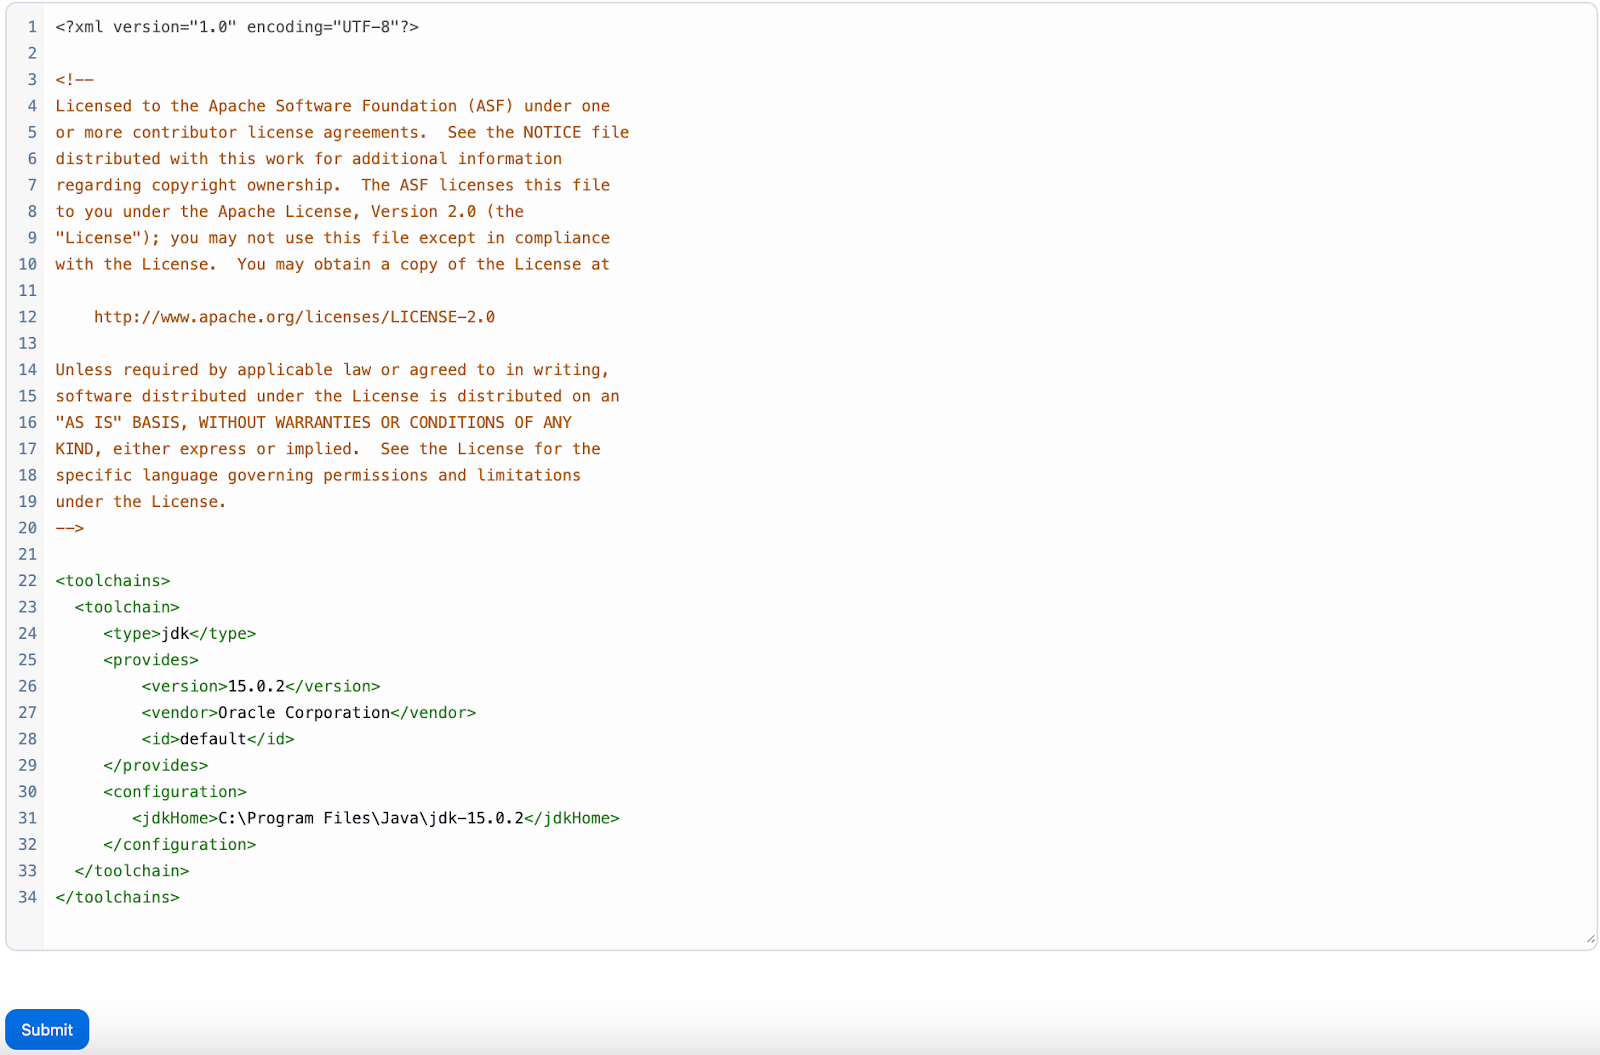
In this case, JDK 15.0.2 is configured.
Step 4: Configure the toolchain XML file in the job configuration
Go to Job Configuration > Scroll down to Build Environment > Check the Provide Configuration files option > Select the config file created earlier > Provide a desired path where the config file should be copied > Scroll down to Build > Specify Goal > Save the configuration.
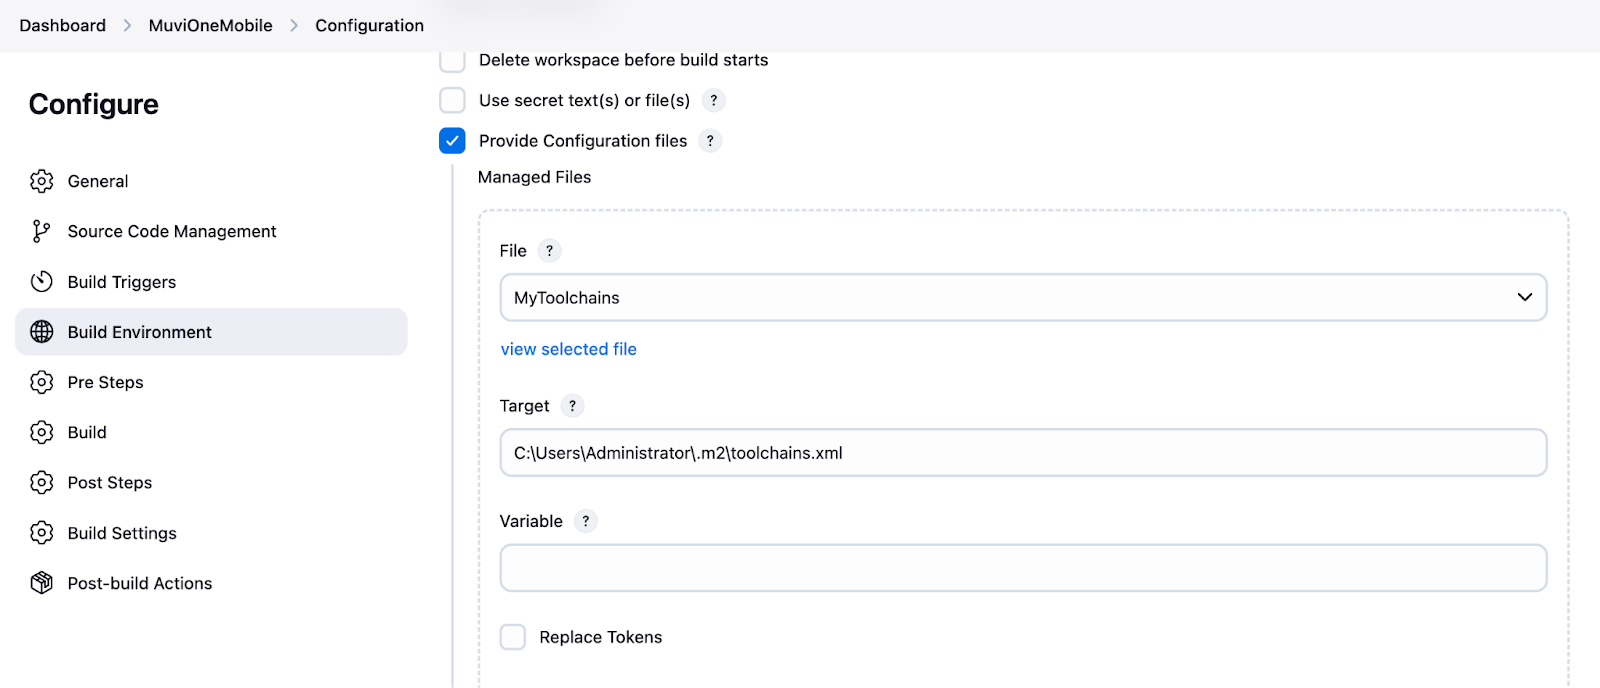
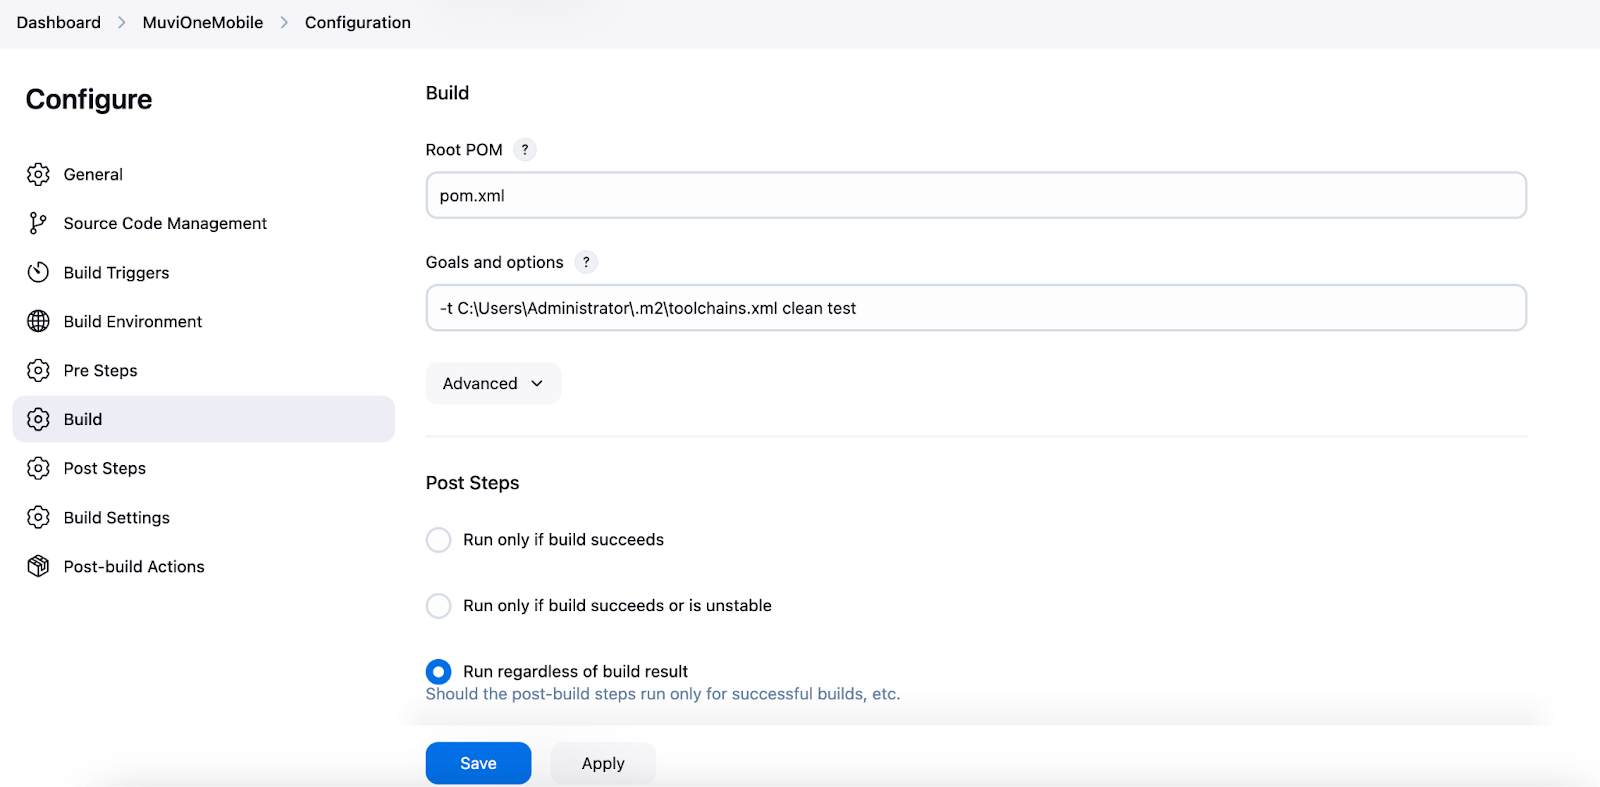
Note: Replace “C:\Users\Administrator\.m2\toolchains.xml” with the exact path of the XML file in your system. “-t” stands for toolchain followed by XML file path and goal.
Step 5: Add Maven Dependency to the pom.xml
Open the pom.xml file > Add the maven toolchains plugin dependency inside the <pluginManagement> element and the goal outside the <pluginManagement> element.
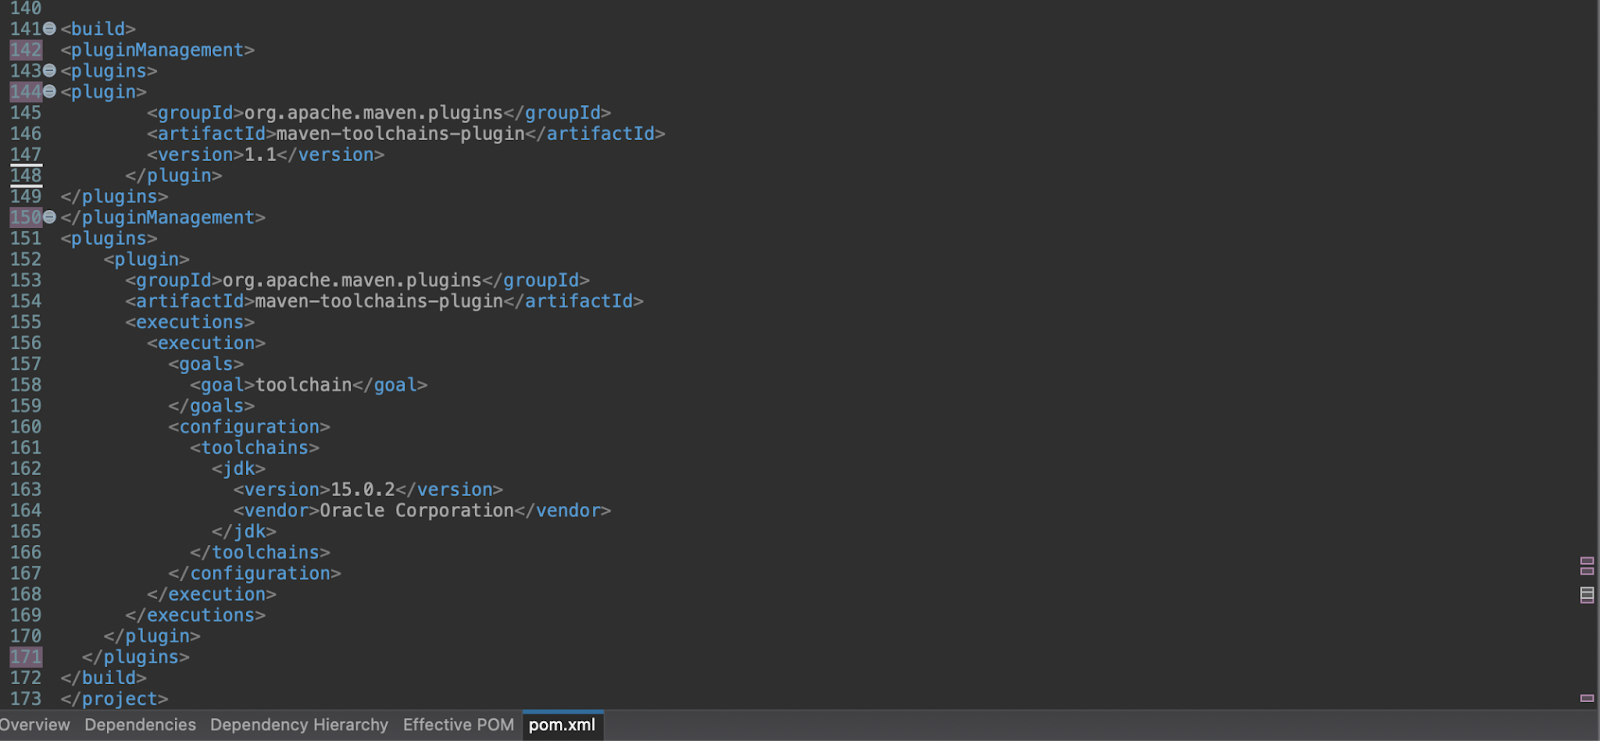
Note: The desired JDK version must be specified in the goal.
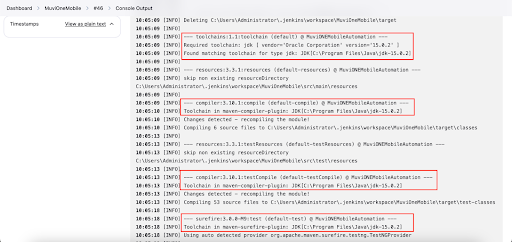
The JDK version used for the job printed in the console.
Conclusion
By following these steps and leveraging the Maven Toolchain plugin, you can effectively manage multiple JDK versions in your Jenkins environment, ensuring flexibility and compatibility for your Maven projects.
At Muvi, we understand the importance of efficiency and adaptability in software development. Our platform empowers businesses to build, manage, and deliver exceptional streaming experiences without worrying about the underlying infrastructure. If you’re looking for a robust, end-to-end solution that simplifies your streaming platform’s development process and accelerates your time to market, explore Muvi’s no-codding OTT solution today.
Take a 14-day free trial of Muvi One. No credit required. Cancel anytime you want. Sign up to get started.


Add your comment