Table of Content
Table of Content
Getting Standard
Reference
- Global Variables
- Layout Structure
- Page Structure
- Default Pages List (Already Integrated across all templates)
- 404 Page
- About Us
- Cast-Details
- Category
- Checkout
- CheckoutFail
- CheckoutSuccess
- Child-Details
- ContactUs
- Content
- Content-Cast-List
- FAQ
- Featured-Contents
- Geo-Restriction
- Home
- Landing
- PasswordRecovery
- PasswordSuccess
- Plan
- Player
- Player-Lite
- Playlist-Details
- Playlist-Player
- PlayListing
- PPV
- Privacy-Policy
- Profile (after login)
- Purchase-History
- Related-ContentList
- ResetPassword
- Search Result
- SignIn
- SignUp
- StaticContent
- Terms-Condition
- Trailer
- VD-Node as Details
- VD-Node Details
- Widget Structure
- How to use any API into Specific page
- Where to put and How to Put
- Quick Links / Reference
BYOD (Bring Your Own Design)
BYOD is built using a powerful template system that enables designers and developers familiar with CSS, HTML, JS Script to modify the presentation and structure of a website.
With our BYOD feature, you can design your own template for your website in Muvi. BYOD allows you to customize the look and feel of your website for individual customers/users/partners.
How to Use
- Go to muvi.com and register for MUVI ONE product to take a free trial.
- Then you will be landed into the Store CMS Dashboard area.
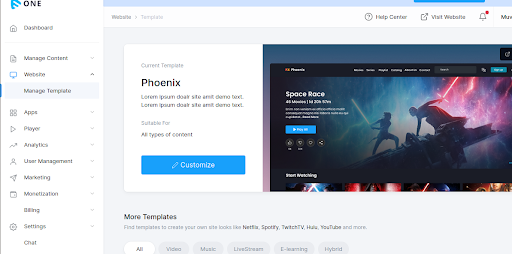
- Now go to the Website menu >> Manage Template >> Click on Customize button. (as per below screenshot) So it will redirect you to the VD domain.
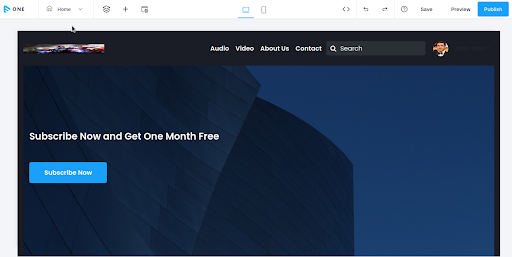
- Once you lend into VD domain, It will show you a full website with manually you can modify/update each element of your website’s pages. See below image for your reference:
- As per above image, We have provided one option (< > Code Editor) where you can click and directly go to the VD code Editor (BYOD) area to manage source code along with you can modify your website template's scripts, HTML, PHP code format for specific files.

Anatomy of a BYOD
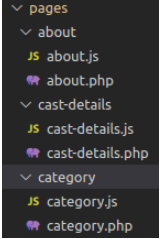
The basic file and folder structure of a template is as in the below image.

| No | Page Name | Js file path | Php file path |
|---|---|---|---|
| 1 | 404 Page | - | 404page.php |
| 2 | About Us | about.js | about.php |
| 3 | Cast-Details | cast-details.js | cast-details.php |
| 4 | Category | category.js | category.php |
| 5 | Checkout | checkout.js | checkout.php |
| 6 | CheckoutFail | checkoutfail.js | checkoutfail.php |
| 7 | CheckoutSuccess | checkoutsuccess.js | checkoutsuccess.php |
| 8 | Child-Details | Child-details.js | Child-details.php |
| 9 | ContactUs | contact-us.js | contact-us.php |
| 10 | Content | content.js | content.php |
| 11 | Content-Cast-List | content-cast-list.js | content-cast-list.php |
| 12 | FAQ | faq.js | faq.php |
| 13 | Featured-Contents | featured-contents.js | featured-content.php |
| 14 | Geo-Restriction | geo-restriction.js | geo-restriction.php |
| 15 | Home | home.js | home.php |
| 16 | Landing | - | landing.php |
| 17 | PasswordRecovery | passwordrecovery.js | passwordrecovery.php |
| 18 | PasswordSuccess | passwordsuccess.js | passwordsuccess.php |
| 19 | Plan | plan.js | plan.php |
| 20 | Player | player.js | player.php |
| 21 | Player-Lite | player-lite.js | player-lite.php |
| 22 | Playlist-Details | playlist-details.js | playlist-details.php |
| 23 | Playlist-Player | - | playlist-player.php |
| 24 | PlayListing | - | playlisting.php |
| 25 | PPV | ppv.js | ppv.php7 |
| 26 | Privacy-Policy | privacy-policy.js | privacy-policy.php |
| 27 | Profile (after login) | profile.js | profile.php |
| 28 | Purchase-History | - | Purchase_history.php |
| 29 | Related-ContentList | related-content-list.js | related-content-list.php |
| 30 | ResetPassword | resetpassword.js | resetpassword.php |
| 31 | SearchResult | searchresult.js | searchresult.php |
| 32 | SignIn | signin.js | signin.php |
| 33 | SignUp | signup.js | signup.php |
| 34 | StaticContent | - | static-content.php |
| 35 | Terms-Condition | terms-conition.js | terms-condition.php |
| 36 | Trailer | trailer.js | trailer.php |
This is how BYOD editor looks like when you land it from the Visual Designer area.

You can use the global variables in any of the view files. Here are all the global variables available for a BYOD template.
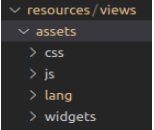
- css: This folder contains all the stylesheet files used for the template.
- img : This folder contains all types of images used for this template.
- js: This folder contains all the javascript files used for the template.
- pages: This folder contains all the view files in html format along with PHP and Vue js component structure wise to load page contents from template that allows you to declaratively bind the rendered DOM to the underlying Vue instance's data and are valid HTML that can be parsed by spec-compliant browsers and HTML parsers.
- widgets: All the basic page elements(Header, Footer, Navigation, Banner, My Profile sections, etc.) are combined into this folder structure to render it dynamically based on individual template wise with separate variants.
- Apart from all these directories, there are some files which reside outside the main location like; layout.php, layout.js, header.php, footer.php, script.php.
All the view files need to be at the same location as you see in the screenshot.view files provide the base HTML structure that wraps web page content.
layout.js, layout.php file is the file responsible for the backbone of all pages in the website which renders all common stylesheet, JS script to all pages thoroughly.
It is possible to Change/Modify the default/base color, styling, etc. CSS property of any template using two ways.
- From CMS >> Manage Website >> Customize Template >> Visual Designer >> BYOD - Code Editor. In the Code editor open the "css" directory and look for the "style.css" file. This file is the default CSS property file for the whole template you have selected. Here you can write or change any CSS property based on your requirement.
- You can also write your own custom CSS class and property into a "local.css" file which will act as your template specific changes you have made for your store and always remain separate from default CSS files. So it will not conflict with existing CSS files.
Requirement
- You need to have basic knowledge in smarty. Our template integration is based on smarty.
- Bootstrap is essential for customization of Muvi Template.
- From a design perspective, Need basic understanding of HTML, CSS, and JavaScript.
- More technical background, You need Vue.Js knowledge to import, export, manage components, template parts, etc to modify widgets.
Global Variables
You can use the global variables in any of the view files. Those global variables are also available in two format :
1) PHP format
Here are all the PHP global variables available for a BYOD template which are placed into layout.php file as below:

2) JS format
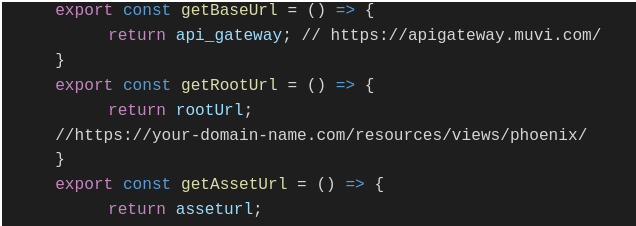
Here are all the JS global variables available for a BYOD template which are placed into resources/views/assets/js/web-service-url.js file as below:

Layout Structure
- Template layouts should be directly in the template/default folder,so that any page can use it.
- If the layout has any components then create a layout.js at the same path and include it in your layout file.
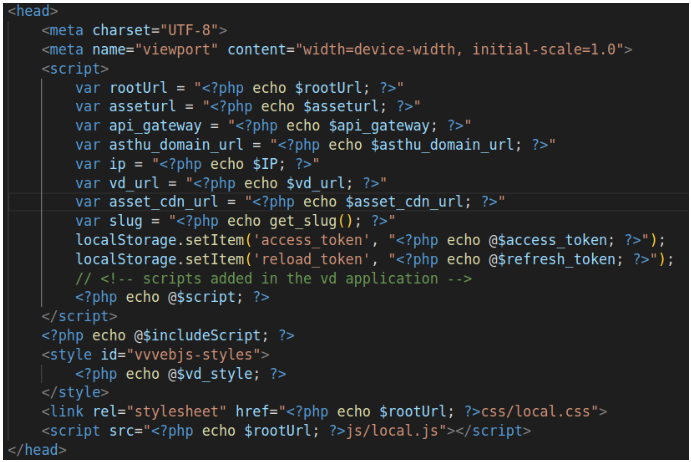
- There are some global variables which should be initialized in the header of each layout like rootUrl, assetUrl, api_gateway, domain_url, ip. And the access token and refresh token will be added into the local storage.
- The local.css and local.js file should be included at the end of section so that it will have the higher prioritization.
- Inside the head tag there should be a tag <style id="vvvebjs-styles"> which is actually to hold the css customized from the vd application
- The body-container section inside the body tag must have a class vd-<current_slug> which helps the vd application to add styling per page specific.
- For all the content of header and footer add it inside header.php and footer.php respectively and its dependent script will be inside layout js.
- Script.php file directly inside the default folder contains all the default js and css files which will be available to all the pages.


Page Structure
- Each folder inside the pages folder must have a .php and .js file except 404 page. And each page file(.php and .js) name should be the same with the folder name.
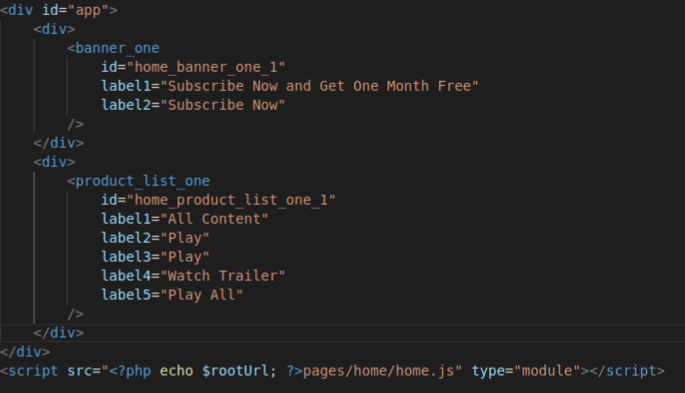
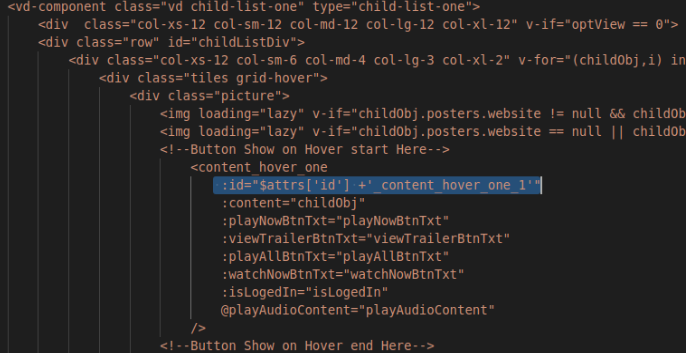
- Every page content should be inside the div container with one and only property id “app”. Inside the app container there will be no php or javascript functions/variables.
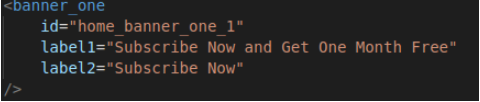
- Components which are included inside the page must have an id as identifier.Preferring id format like <slug>_<component_name>_<count>
- To pass the parameters to the component use the keyword label along with an integer count(like; label1, label2, …).
- For the components added in the header or footer files should use the class as header or footer respectively.
- For any static label use the class i18n to the parent container for the multilingual support.
- For any anchor tag() use the class callByAjax for sticky loading(like; audio player).
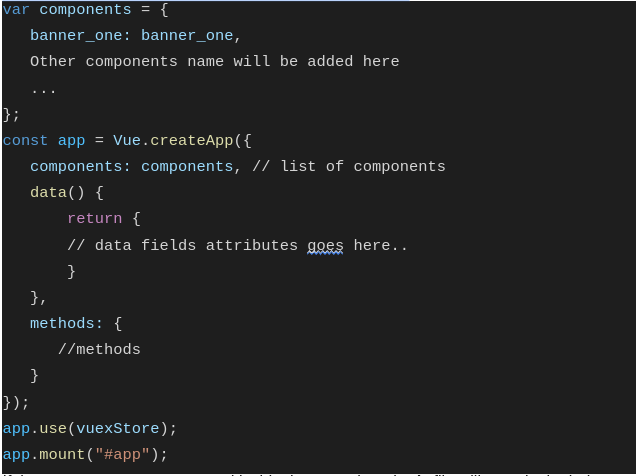
- In the page js file, the component import path will always be relative and start from the folder widgets. For example,
- Component alias name will always be the same as component name in the import statement and components variable declaration statement.
- All the required components will be initiated inside components variable objects and will be used inside the Vue.createApp script. For example;
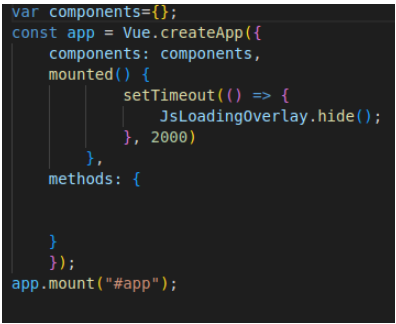
- If there are no components used inside the page then the js file will contain the below dump script.
Note:You can use $rootUrl for any image src like things.
The respective page js file will be included after the app container. See the home.js script file as reference.


Default Pages List (Already Integrated across all templates)
Each template specific we have some common pages which are already integrated and developed from our developer team and you can also find below details for each page.
-> 404 Page
- Route/URL
- /404
- Path
- pages/404page/404page.php
- Widgets Used
- -
- External Directives/Plugin
- -
- API Endpoint Used
- -
-> About Us
- Route/URL
- /about-us
- Path
- pages/about/about.js,
pages/about/about.php - Widgets Used
- -
- External Directives/Plugin
- -
- API Endpoint Used
- -
-> Cast-Details
- Route/URL
- /cast-details/{permalink}
- Path
- pages/cast-details/cast-details.js,
pages/cast-details/cast-details.php - Widgets Used
- cast_banner_one, cast_filmography_one
- External Directives/Plugin
- -
- API Endpoint Used
- CastDetails / Content : https://developer.muvi.com/api/#api-Content-getCastDetails
-> Category
- Route/URL
- /category/{permalink}
- Path
- pages/category/category.js,
pages/category/category.php - Widgets Used
- category_list_one
- External Directives/Plugin
- TooltipDirective, vuexStore
- API Endpoint Used
- - Menu : frontend/get-menu(VD),
- isAuthorizedContent (param passed to API is content_uuid) : https://developer.muvi.com/api/#api-Content-isAuthorized
-> Checkout
- Route/URL
- /checkout/{sst_token}/{billing_type}
- Path
- pages/checkout/checkout.js,
pages/checkout/checkout.php - Widgets Used
- checkout_one
- External Directives/Plugin
- CreditCardFormatDirective, ExpiryFormatDirective, CvcFormatDirective, TooltipDirective
- API Endpoint Used
- - checkGateway: gateway/status (VD),
- getPurchaseDetails: transactions/get-purchase-details (VD),
- getCardList: https://developer.muvi.com/api/#api-Cards-Cards_List,
- checkOutOptions: payment/checkout-options,
- confirmCheckout : payment/confirm-checkout(VD)
-> CheckoutFail
- Route/URL
- /checkout-fail
- Path
- pages/checkoutfail/checkoutfail.js,
pages/checkoutfail/checkoutfail.php - Widgets Used
- -
- External Directives/Plugin
- -
- API Endpoint Used
- -
-> CheckoutSuccess
- Route/URL
- /checkout-success
- Path
- pages/checkoutsuccess/checkoutsuccess.js,
pages/checkoutsuccess/checkoutsuccess.php - Widgets Used
- -
- External Directives/Plugin
- -
- API Endpoint Used
- -
-> Child-Details
- Route/URL
- /child-details/{permalink}
- Path
- pages/child-details/child-details.js,
pages/child-details/child-details.php - Widgets Used
- child_details_one, content_purchase_one
- External Directives/Plugin
- vuexStore
- API Endpoint Used
- - categorizedPermalink : https://developer.muvi.com/api/#api-Content-get_contentDetails
- getChildDetails(parentUuid, pageNo, perPage) : https://developer.muvi.com/api/#api-Content-childList
- getContentDetails(parentUuid, isPlaylist) : https://developer.muvi.com/api/#api-Content-get_contentDetails
- getPlayerParentPermarlinkDetails(params) : player/player-permalink
- isAuthorizedContent (uuid) : https://developer.muvi.com/api/#api-Content-isAuthorized
- getEndUserRegdLoginSetting : https://developer.muvi.com/api/#api-Util-getconfig
- getContentParentUuid(params) : https://developer.muvi.com/api/#api-Content-Get_root_parent
- getVideoDetails(params) : player/polyglot
-> ContactUs
- Route/URL
- /contact-us
- Path
- pages/contact-us/contact-us.js,
pages/contact-us/contact-us.php - Widgets Used
- contact_us_one
- External Directives/Plugin
- -
- API Endpoint Used
- - contactUs(contactusDetails) : /contactus
- validateStoreAdminToken : /validateToken
-> Content
- Route/URL
- /content/{permalink}
- Path
- pages/content/content.js,
pages/content/content.php - Widgets Used
- product_details_one, related_content_one, content_purchase_one, castcrew_list_one, content_banner_one, content_addon_assets_one
- External Directives/Plugin
- vuexStore
- API Endpoint Used
- - getContentSettingsDetails(structureUuid) : https://developer.muvi.com/api/#api-Content-Content_Settings
- getContentDetails(parentUuid, isPlaylist) : https://developer.muvi.com/api/#api-Content-get_contentDetails
- getChildDetails(parentUuid, pageNo, perPage) : https://developer.muvi.com/api/#api-Content-childList
- categorizedPermalink(permalink) : hhttps://developer.muvi.com/api/#api-Content-get_contentDetails
- likeDislike(details) : https://developer.muvi.com/api/#api-Content-Save_Content_Likes
- makeContentFavorite(details) : https://developer.muvi.com/api/#api-Content-Favourite_Content_Add
- getContentFavoriteStatus(contentUuid) : https://developer.muvi.com/api/#api-Content-favouriteContentList
-> Content-Cast-List
- Route/URL
- /content/{permalink}/casts
- Path
- pages/content-cast-list/content-cast-list.js,
pages/content-cast-list/content-cast-list.php - Widgets Used
- castcrew_list_two
- External Directives/Plugin
- vuexStore
- API Endpoint Used
- - getContentCastList(contentUuid) : https://developer.muvi.com/api/#api-Content-get_contentDetails
- categorizedPermalink(permalink) : https://developer.muvi.com/api/#api-Content-get_contentDetails
-> FAQ
- Route/URL
- -
- Path
- pages/faq/faq.js,
pages/faq/faq.php - Widgets Used
- -
- External Directives/Plugin
- -
- API Endpoint Used
- -
-> Featured-Contents
- Route/URL
- /featured-contents/{permalink}
- Path
- pages/featured-contents/featured-contents.js,
pages/featured-contents/featured-contents.php - Widgets Used
- featured_content_list_one, content_purchase_one
- External Directives/Plugin
- vuexStore
- API Endpoint Used
- - getFeaturedSectionDataByUuid(featuredSectioUuid, pageContent) : https://developer.muvi.com/api/#api-Content-Featured_Content_List
- generateSST(params) : 'transactions/generate-sst' (VD)
- getChildDetails(parentUuid, pageNo, perPage) : https://developer.muvi.com/api/#api-Content-childList
- getContentDetails(parentUuid, isPlaylist) : https://developer.muvi.com/api/#api-Content-get_contentDetails
- getPlanDetails(countryCode) : https://developer.muvi.com/api/#api-Subscription-Subscription_Plan_Details
- getPpvPlans(params) : https://developer.muvi.com/api/#api-PPV-PPV_Plans
- isSubscriptionEnabled : https://developer.muvi.com/api/#api-Subscription-Is_Subscription_enabled
- getUserIpLocation() : https://www.cloudflare.com/cdn-cgi/trace
- isAuthorizedContent(uuid) : hhttps://developer.muvi.com/api/#api-Content-isAuthorized
-> Geo-Restriction
- Route/URL
- -
- Path
- pages/geo-restriction/geo-restriction.js,
pages/geo-restriction/geo-restriction.php - Widgets Used
- -
- External Directives/Plugin
- -
- API Endpoint Used
- -
-> Home
- Route/URL
- /home, “/”
- Path
- pages/home/home.js,
pages/home/home.php - Widgets Used
- banner_one, product_list_one, default_featureslist_one, content_purchase_one
- External Directives/Plugin
- vuexStore
- API Endpoint Used
- - getBannerDetails() : https://developer.muvi.com/api/#api-Visual_Design-GetConfig(VD)
- getContent(param) : https://developer.muvi.com/api/#api-Content-get_contentDetails
- isAuthorizedContent(uuid) : https://developer.muvi.com/api/#api-Content-isAuthorized
- getFeaturedSectionData(page) : https://developer.muvi.com/api/#api-Content-Featured_Content_List
- generateSST(params) : https://developer.muvi.com/api/#api-Transactions
- getChildDetails(parentUuid, pageNo, perPage) : https://developer.muvi.com/api/#api-Content-childList
- getContentDetails(parentUuid, isPlaylist) : https://developer.muvi.com/api/#api-Content-get_contentDetails
- getPlanDetails(countryCode) : https://developer.muvi.com/api/#api-Subscription-Subscription_Plan_Details
- getPpvPlans(params) : https://developer.muvi.com/api/#api-PPV-PPV_Plans
- isSubscriptionEnabled : https://developer.muvi.com/api/#api-Subscription-Is_Subscription_enabled
- getUserIpLocation() : https://www.cloudflare.com/cdn-cgi/trace
- isAuthorizedContent(uuid) : https://developer.muvi.com/api/#api-Content-isAuthorized
-> Landing
- Route/URL
- -
- Path
- pages/landing/landing.php
- Widgets Used
- -
- External Directives/Plugin
- -
- API Endpoint Used
- - getFeaturedSectionData(page) : https://developer.muvi.com/api/#api-Content-Featured_Content_List
-> PasswordRecovery
- Route/URL
- /password-recovery
- Path
- pages/passwordrecovery/passwordrecovery.js,
pages/passwordrecovery/passwordrecovery.php - Widgets Used
- forgotpwd_one
- External Directives/Plugin
- -
- API Endpoint Used
- - forgotPwd(details) : https://developer.muvi.com/api/#api-User-forgot-password
-> PasswordSuccess
- Route/URL
- /password-success
- Path
- pages/passwordsuccess/passwordsuccess.js,
pages/passwordsuccess/passwordsuccess.php - Widgets Used
- product_details_one, related_content_one, content_purchase_one, castcrew_list_one, content_banner_one, content_addon_assets_one
- External Directives/Plugin
- vuexStore
- API Endpoint Used
- - getSubscriptionPlans(countryCode) : https://developer.muvi.com/api/#api-Subscription-Subscription_Plans
- generateSST(params) : https://developer.muvi.com/api/#api-Transactions
- getUserIpLocation() : https://www.cloudflare.com/cdn-cgi/trace
-> Plan
- Route/URL
- /all-plan
- Path
- pages/plan/plan.js,
pages/plan/plan.php - Widgets Used
- allplan_one
- External Directives/Plugin
- vuexStore
- API Endpoint Used
- - getSubscriptionPlans(countryCode) : https://developer.muvi.com/api/#api-Subscription-Subscription_Plans
- generateSST(params) : https://developer.muvi.com/api/#api-Transactions
- getUserIpLocation() : https://www.cloudflare.com/cdn-cgi/trace
-> Player
- Route/URL
- /player/{permalink}
- Path
- pages/player/player.js,
pages/player/player.php - Widgets Used
- player_one, reviewrating_one
- External Directives/Plugin
- vuexStore
- API Endpoint Used
- - getContentReview(contentUuid) : https://developer.muvi.com/api/#api-Content-get_contentDetails
- getContentDetails(parentUuid, isPlaylist) : https://developer.muvi.com/api/#api-Content-get_contentDetails
- categorizedPermalink(permalink) : https://developer.muvi.com/api/#api-Content-get_contentDetails
- cagetEndUserRegdLoginSetting() : https://developer.muvi.com/api/#api-Util-getconfig
- validateToken() : ‘/validateToken’ (VD)
- getReviewRating(contentUuid, page) : https://developer.muvi.com/api/#api-Content-Content_Reviews
- SaveContentReview(params) : https://developer.muvi.com/api/#api-Content-Save_Content_Reviews
- getContentReviewRatingSettingsDetails() : https://developer.muvi.com/api/#api-Content-Content_Settings
-> Player-Lite
- Route/URL
- /content/{permalink}/addon/{addonuuid}
- Path
- pages/player-lite/player-lite.js,
pages/player-lite/player-lite.php - Widgets Used
- player_lite_one
- External Directives/Plugin
- vuexStore
- API Endpoint Used
- - getContentAddonDetails(parentUuid, addonUuid) : https://developer.muvi.com/api/#api-Content-addons
- categorizedPermalink(permalink) : https://developer.muvi.com/api/#api-Content-get_contentDetails
-> Playlist-Details
- Route/URL
- /playlist/{permalink}
- Path
- pages/playlist-details/playlist-details.js,
pages/playlist-details/playlist-details.php - Widgets Used
- playlist_details_one, content_purchase_one, reviewrating_one, playlist_banner_one
- External Directives/Plugin
- vuexStore
- API Endpoint Used
- - categorizedPermalink(permalink) : https://developer.muvi.com/api/#api-Content-get_contentDetails
- getPlaylistDetailsForPlaylistPage(parentUuid) : https://developer.muvi.com/api/#api-Content-get_contentDetails
- isAuthorizedContent(uuid) : https://developer.muvi.com/api/#api-Content-isAuthorized
- generateSST(params) : https://developer.muvi.com/api/#api-Transactions-Generate_SST
- getChildDetails(parentUuid, pageNo, perPage) : https://developer.muvi.com/api/#api-Content-childList
- getContentDetails(parentUuid, isPlaylist) : https://developer.muvi.com/api/#api-Content-get_contentDetails
- getPlanDetails(countryCode) : https://developer.muvi.com/api/#api-Subscription-Subscription_Plan_Details
- getPpvPlans(params) : https://developer.muvi.com/api/#api-PPV-PPV_Plans
- isSubscriptionEnabled : https://developer.muvi.com/api/#api-Subscription-Is_Subscription_enabled
- getUserIpLocation() : https://www.cloudflare.com/cdn-cgi/trace
- validateToken() : '/validateToken' (VD)
- getReviewRating(contentUuid, page) : https://developer.muvi.com/api/#api-Content-Content_Reviews
- SaveContentReview(params) : https://developer.muvi.com/api/#api-Content-Save_Content_Reviews
- getContentReviewRatingSettingsDetails() : https://developer.muvi.com/api/#api-Content-Content_Settings
- getContentSettingsDetails(structureUuid) : https://developer.muvi.com/api/#api-Content-Content_Settings
- getContentDetails(parentUuid, isPlaylist) : https://developer.muvi.com/api/#api-Content-get_contentDetails
- categorizedPermalink(permalink) : https://developer.muvi.com/api/#api-Content-get_contentDetails
- getContentFavoriteStatus(contentUuid) : https://developer.muvi.com/api/#api-Content-favouriteContentList
- getRelatedContent(parentUuid, page) : https://developer.muvi.com/api/#api-Content-relatedContent
- getVideoDetails(params) : '/player/polyglot'
- getLocation(ip) : 'ip2loc/ip/'
-> Playlist-Player
- Route/URL
- /playlist_player/{permalink}
- Path
- pages/playlist-player/playlist-player.php
- Widgets Used
- player-one, playlist_player, reviewrating
- External Directives/Plugin
- vuexStore
- API Endpoint Used
- - validateToken() : '/validateToken' (VD)
- getReviewRating(contentUuid, page) : https://developer.muvi.com/api/#api-Content-Content_Reviews
- SaveContentReview(params) : https://developer.muvi.com/api/#api-Content-Save_Content_Reviews
- categorizedPermalink(permalink) : https://developer.muvi.com/api/#api-Content-get_contentDetails
- getContentReviewRatingSettingsDetails() : https://developer.muvi.com/api/#api-Content-Content_Settings
-> PlayListing
- Route/URL
- /playlist/{permalink}
- Path
- pages/playlisting/playlisting.php
- Widgets Used
- playlist-listing-one
- External Directives/Plugin
- vuexStore
- API Endpoint Used
- -
-> PPV
- Route/URL
- /content-purchase/{permalink}
- Path
- pages/ppv/ppv.js,
pages/ppv/ppv.php - Widgets Used
- content_purchase_one
- External Directives/Plugin
- vuexStore
- API Endpoint Used
- - generateSST(params) : https://developer.muvi.com/api/#api-Transactions-Generate_SST
- getChildDetails(parentUuid, pageNo, perPage): https://developer.muvi.com/api/#api-Content-childList
- getContentDetails(parentUuid, isPlaylist) : hhttps://developer.muvi.com/api/#api-Content-get_contentDetails
- getPlanDetails(countryCode) : https://developer.muvi.com/api/#api-Subscription-Subscription_Plan_Details
- getPpvPlans(params) : https://developer.muvi.com/api/#api-PPV-PPV_Plans
- isSubscriptionEnabled : https://developer.muvi.com/api/#api-Subscription-Is_Subscription_enabled
- getUserIpLocation() : https://www.cloudflare.com/cdn-cgi/trace
- isAuthorizedContent(uuid) : https://developer.muvi.com/api/#api-Content-isAuthorized
-> Privacy-Policy
- Route/URL
- /privacy-policy
- Path
- pages/privacy-policy/privacy-policy.js,
pages/privacy-policy/privacy-policy.php - Widgets Used
- purchase-history-one
- External Directives/Plugin
- -
- API Endpoint Used
- -
-> Profile (after login)
- Route/URL
- /profile
- Path
- pages/profile/profile.js,
pages/profile/profile.php - Widgets Used
- card_one, profile_one, my_library_one, my_favorites_one, watch_history_one, purchase_history_one
- External Directives/Plugin
- vuexStore, CreditCardFormatDirective, ExpiryFormatDirective, CvcFormatDirective
- API Endpoint Used
- - getConfig() : https://developer.muvi.com/api/#api-Util-getconfig
- clearWatchHistory() : https://developer.muvi.com/api/#api-Media-Clear_Media_History
- getMonetizationSettings() : https://developer.muvi.com/api/#api-Util-getconfig
- getFavouriteSettingStatus() : https://developer.muvi.com/api/#api-Content-Content_Settings
- getCardList() : https://developer.muvi.com/api/#api-Cards-Cards_List
- makeDefault = async (params) : https://developer.muvi.com/api/#api-Cards-Make_Default_Card
- deleteCard = async (params) : https://developer.muvi.com/api/#api-Cards-Delete_card
- getCardForms = async (param) : https://developer.muvi.com/api/#api-Cards-Card_Form
- addCard = async (carddetails) : https://developer.muvi.com/api/#api-Cards-Add_card
- getUserDetails() : https://developer.muvi.com/api/#api-User-getUserDetails
- updateUserDetails = async (formdata) : https://developer.muvi.com/api/#api-User-update-profile
- changePassword = async (pwdDetails) : https://developer.muvi.com/api/#api-User-change-password
- getMyPlan = async () : https://developer.muvi.com/api/#api-Subscription-My_Plans
- isSubscriptionEnabled : https://developer.muvi.com/api/#api-Subscription-Is_Subscription_enabled
- getSubscriptionPlans(countryCode) : https://developer.muvi.com/api/#api-Subscription-Subscription_Plans
- generateSST(params) : https://developer.muvi.com/api/#api-Transactions-Generate_SST
- removeProfilePic() : https://developer.muvi.com/api/#api-User-remove-image
- getEndUserRegdLoginSetting() : https://developer.muvi.com/api/#api-Util-getconfig
- getMonetizationSettings() : https://developer.muvi.com/api/#api-Util-getconfig
- getUserIpLocation() : https://www.cloudflare.com/cdn-cgi/trace
- getAllContentDeatils() : https://developer.muvi.com/api/#api-Content-get_contentDetails
- getFavoriteContents(page) : https://developer.muvi.com/api/#api-Content-favouriteContentList
- makeContentFavorite(details) : https://developer.muvi.com/api/#api-Content-Favourite_Content_Add
- getWatchHistory = async (page) : https://developer.muvi.com/api/#api-Media-Media_Played_History
- clearWatchHistory() : https://developer.muvi.com/api/#api-Media-Clear_Media_History
- getContentParentUuid(params) : https://developer.muvi.com/api/#api-Content-Get_root_parent
- purchaseHistory() : https://developer.muvi.com/api/#api-Transactions-Payment_History
- viewInvoiceDetails(order_uuid) : https://developer.muvi.com/api/#api-Transactions-Invoice_Details
-> Purchase-History
- Route/URL
- /purchase-history
- Path
- pages/purchase_history/purchase_history.js,
pages/purchase_history/purchase_history.php - Widgets Used
- player_lite_one
- External Directives/Plugin
- vuexStore
- API Endpoint Used
- - purchaseHistory() : https://developer.muvi.com/api/#api-Transactions-Payment_History
- viewInvoiceDetails(order_uuid) : https://developer.muvi.com/api/#api-Transactions-Invoice_Details
-> Related-ContentList
- Route/URL
- /content/{permalink}/related-contents
- Path
- pages/related-content-list/related-content-list.js,
pages/related-content-list/related-content-list.php - Widgets Used
- related_content_two, content_purchase_one
- External Directives/Plugin
- vuexStore
- API Endpoint Used
- - getRelatedContent(parentUuid, page) : https://developer.muvi.com/api/#api-Content-relatedContent
- categorizedPermalink(permalink) : hhttps://developer.muvi.com/api/#api-Content-get_contentDetails
- generateSST(params) : https://developer.muvi.com/api/#api-Transactions-Generate_SST
- getChildDetails(parentUuid, pageNo, perPage) : https://developer.muvi.com/api/#api-Content-childList
- getContentDetails(parentUuid, isPlaylist) : https://developer.muvi.com/api/#api-Content-get_contentDetails
- getPlanDetails(countryCode) : https://developer.muvi.com/api/#api-Subscription-Subscription_Plan_Details
- getPpvPlans(params) : https://developer.muvi.com/api/#api-PPV-PPV_Plans
- isSubscriptionEnabled : https://developer.muvi.com/api/#api-Subscription-Is_Subscription_enabled
- getUserIpLocation() : https://www.cloudflare.com/cdn-cgi/trace
- isAuthorizedContent(uuid) : https://developer.muvi.com/api/#api-Content-isAuthorized
-> ResetPassword
- Route/URL
- /reset-password/{permalink}
- Path
- pages/resetpassword/resetpassword.js,
pages/resetpassword/resetpassword.php - Widgets Used
- resetpassword_one
- External Directives/Plugin
- -
- API Endpoint Used
- - resetPassword(passwordDetails) : https://developer.muvi.com/api/#api-User-reset-password
-> SearchResult
- Route/URL
- /search-result/{permalink}
- Path
- pages/searchresult/searchresult.js,
pages/searchresult/searchresult.php - Widgets Used
- searchlistdetails_one, content_purchase_one, content_hover_one, audio_player_one
- External Directives/Plugin
- vuexStore
- API Endpoint Used
- - getSerachContentDeatils(uuid, pageNo) : https://developer.muvi.com/api/#api-Content-get_contentDetails
- getPlayerParentPermarlinkDetails(params) : player/player-permalink
- isAuthorizedContent (uuid) : https://developer.muvi.com/api/#api-Content-contentList
- getEndUserRegdLoginSetting : https://developer.muvi.com/api/#api-Util-getconfig
- getVideoDetails(params) : '/player/polyglot'
- getContentParentUuid(params) : https://developer.muvi.com/api/#api-Content-Get_root_parent
-> SignIn
- Route/URL
- /sign-in
- Path
- pages/signin/signin.js,
pages/signin/signin.php - Widgets Used
- login_one
- External Directives/Plugin
- vuexStore
- API Endpoint Used
- - loginUser(loginDetails) : https://developer.muvi.com/api/#api-End_User-login
- getEndUserRegdLoginSetting : https://developer.muvi.com/api/#api-Util-getconfig
-> SignUp
- Route/URL
- /sign-up
- Path
- pages/signup/signup.js,
pages/signup/signup.php - Widgets Used
- register_one
- External Directives/Plugin
- vuexStore
- API Endpoint Used
- - registerUser(userDetails) : https://developer.muvi.com/api/#api-End_User-registration
- getUserDetails() : https://developer.muvi.com/api/#api-User-getUserDetails
- isSubscriptionEnabled : https://developer.muvi.com/api/#api-Subscription-Is_Subscription_enabled
- getSubscriptionPlans(countryCode) : https://developer.muvi.com/api/#api-Subscription-Subscription_Plans
- getEndUserRegdLoginSetting() : https://developer.muvi.com/api/#api-Util-getconfig
-> StaticContent
- Route/URL
- Dynamically created/appended
- Path
- pages/static-content/static-content.php
- Widgets Used
- -
- External Directives/Plugin
- -
- API Endpoint Used
- -
-> Terms-Condition
- Route/URL
- /terms-condition
- Path
- pages/terms-condition/terms-condition.js,
pages/terms-condition/terms-condition.php - Widgets Used
- -
- External Directives/Plugin
- -
- API Endpoint Used
- -
-> Trailer
- Route/URL
- /trailer/{permalink}
- Path
- pages/trailer/trailer.js,
pages/trailer/trailer.php - Widgets Used
- trailer_one
- External Directives/Plugin
- -
- API Endpoint Used
- - categorizedPermalink(permalink) : https://developer.muvi.com/api/#api-Content-get_contentDetails
VD-Node as Elements

VD-Node as Details
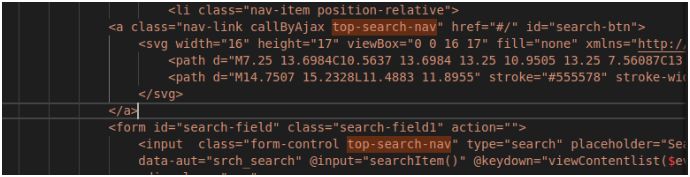
Note- For vd-node Header add top-search-nav this class to search input in header also to the search button.
Ex-
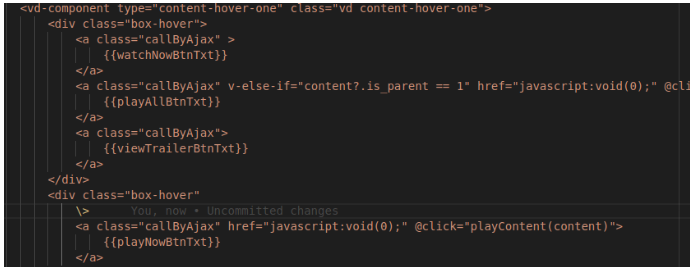
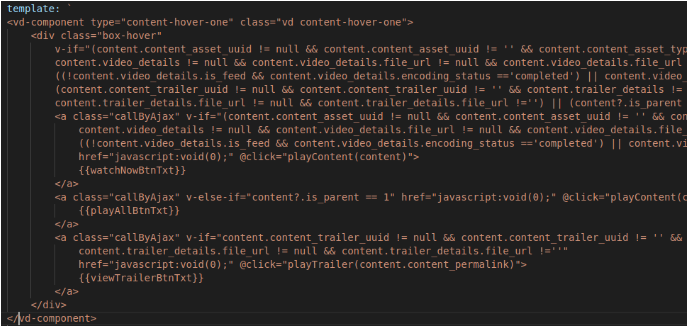
Note- For disabling a button click from vd please add box-hover class to its parent div in content-hover.
Ex-
Note- For disabling any element in vd add this class disableIn-vd.
Note- For hiding any element in vd add this class hideIn-vd.
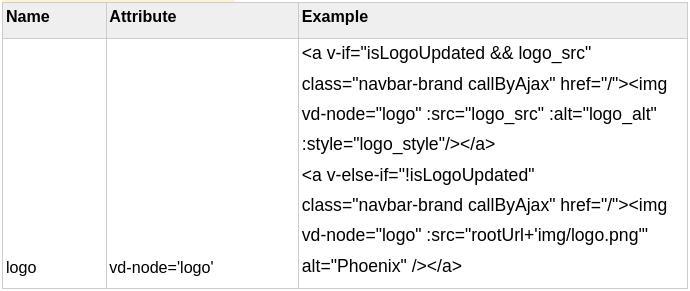
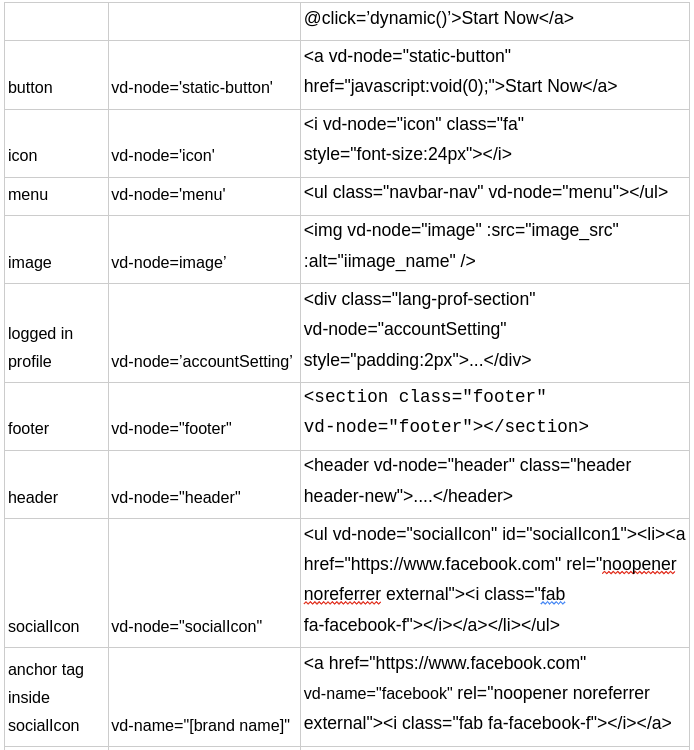
-> Logo
Note-Initialize these to data property logo_src: '',logo_alt: '',logo_style: '',isLogoUpdated:Boolean
[Attributes]
- Attributes
- Description
- vd-node="logo"
- This is used to identify the type of vd-node
- :src="logo_src
- This is used for setting url/src from VD
- :alt="logo_alt"
- This is used for setting alt/name of logo from VD
- :style="logo_style"
- This is used for setting style of logo from VD
[Css]
- Css
- Description
- width/height
- There will be not any fixed max-width/max-height values as the resize part will handle from VD
[Code logic]
- Code
- Description
- getVdConfig("logo").then((res) => {if (res.data.code == 200 && res.data.data !== null) { this.isLogoUpdated=true;this.logo_alt=res.data.data.alt; this.logo_src=res.data.data.src; this.logo_style=res.data.data.style; }else{ this.isLogoUpdated=false;}}).catch((ex) => { console.log(ex); });
- getVdConfig- Is used to get the changes details from VD like style,src,alt and sets the same to Logo in front end.
Import getVdConfig from webservices.js , initialize logo variable to null in data return property like logo: null
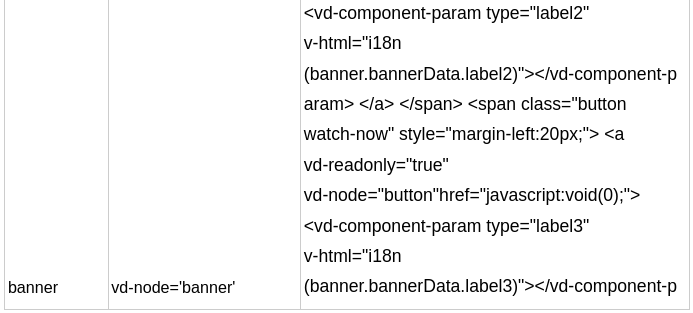
-> Banner
[Attributes]
- Attributes
- Description
- vd-node="banner"
- This is used to identify the type of vd-node
- :style
- This is used for setting background image or background color from VD like below.
:style="{'background': banner.type == 'image' ? 'url('+ banner.image_src +')' : banner.image_src }"
Note-The above condition checks if type is image or solid background color - :image-src="banner.image_src"
- This property is used to hold a src reference to the respective banner
- :image-alt="banner.image"
- This is used for setting the name of the banner
- :id="'banner-'+ banner.id"
- This is used for setting the id of the banner
- :type="banner.type"
- This is used for setting the type of the banner
[Css]
- Css
- Description
- Add this class banner-section-navarrow to the banner section tag
- Add the banner-section-navarrow class to the banner section like below.
<section class="banner-section banner-section-navarrow">
Note- The above class is used for custom directional control of banners from VD.
Note- There will be not any inline style attached to the banner div as it will not consider from VD.
[Code logic]
- Code
- Description
- getVdConfig(this.$attrs['id']).then((res) => { if (res.data.code == 200 && res.data.data.data !== null) { this.allBanner = res.data.data.data; window.carouselSettings = res.data.data.settings; } });
- getVdConfig- Is used to get the uploaded banner and settings from VD.
Import getVdConfig from webservices.js , initialize allBanner empty array in data return property like allBanner: []
window.carouselSettings: Is gets/sets the banner carousel data fromVD
Note- The html design will remain the same for any template.
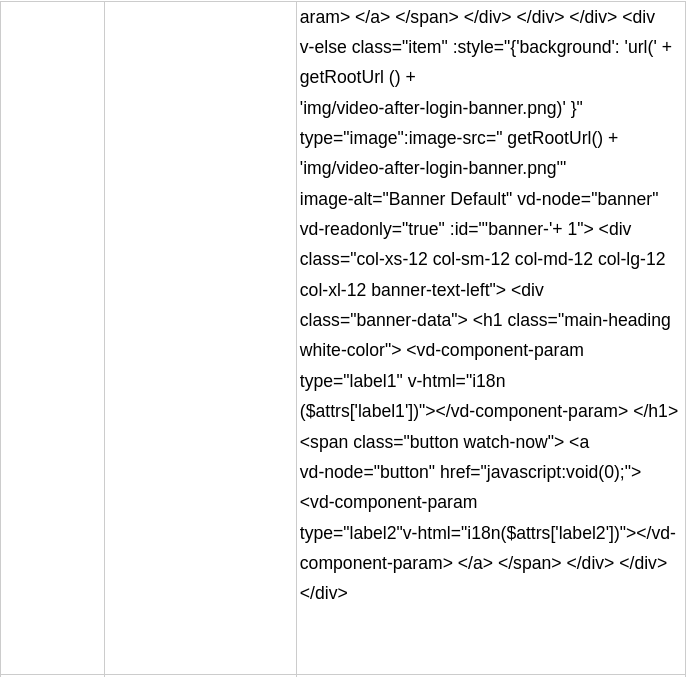
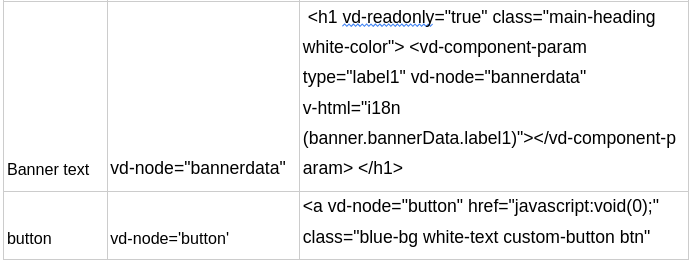
-> Banner Text
[Attributes]
- Attributes
- Description
- vd-node="bannerdata"
- This is used to identify the type of text in banner
[Attributes]
- Attributes
- Description
- vd-node="menu"
- This is used to identify the type of vd-node
- :href[category]
- This is used for setting href/link generated from VD
The href link sets based on the value of link_to attribute as below.
:href="data.category_permalink" [when v-if="data.link_to == 'web'"] :href="'/'+data.category_permalink" [when v-if="data.link_to == 'page'"] :href="'/category/'+data.category_permalink" [when v-if="data.link_to == 'dynamic'"] - :href[sub category]
- This is used for setting href/link generated from VD
The href link sets based on the value of link_to attribute as below.
:href="subCat.category_permalink" [when v-if="subCat.link_to == 'web'"] :href="'/'+subCat.category_permalink" [when v-if="subCat.link_to == 'page'"] :href="'/category/'+subCat.category_permalink" [when v-if="subCat.link_to == 'dynamic'"] - :id="data.category_permalink"
- This is used for setting dynamic id generated from VD
- link_to
- This property of categorydetails has 3 values [web,page,dynamic]
Web- For External link
Dynamic-For Category
Page- For page listed in VD
Ex:- v-if="data.link_to == 'web'" - :class
- This attr is used to append active class from VD
Like- :class="[activeRoute == data.category_permalink? activeClass:'']"
Add the below code in the mounted cycle for active class [css changes] sets from VD.
this.activeRoute = window.location.pathname.split('/')[window.location.pathname.split('/').length - 1]; this.activeClass = "activeClass"; - :data-subcatID
- This attr is used for setting sub category id .
Like- :data-subcatID="subCat.category_name"
[Css]
- Css
- Description
- hoverClass
- This class is used for hover settings data for Menu
- vd_submenu_div
- This class is used for sub category parent div
- vd_sideheader_a
- This class is used for anchor [a] tag
- vd_sideheader_li
- This class is used for parent li
[Code logic]
- Code
- Description
- getCategoryDetails().then((res) => { if (res.data.code == 200 && res.data.data !== null) { this.categoryDetails = res.data.data.assigned_categories; } }).catch(ex => { console.log(ex); });
- getCategoryDetails- Is used to get the changes details from VD like style,src,alt and sets the same to Logo in front end.
Import getVdConfig from webservices.js , initialize categoryDetails empty array in data return property like categoryDetails:[]
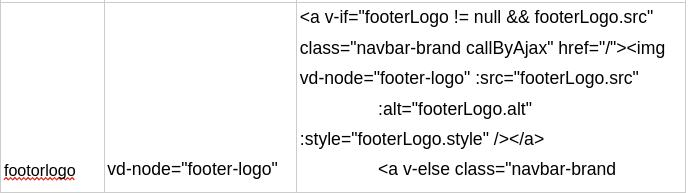
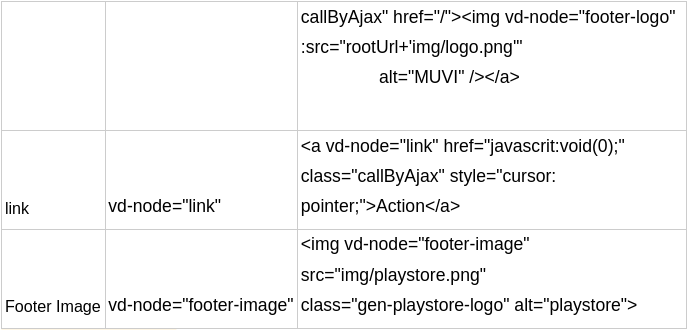
-> Footer Logo
[Attributes]
- Attributes
- Description
- vd-node="footer-logo"
- This is used to identify the type of vd-node
- :src="footerLogo.src"
- This is used for setting url/src from VD
- :alt="footerLogo.alt"
- This is used for setting alt/name of footer logo from VD
- :style="footerLogo.style"
- This is used for setting style of footer logo from VD
[Css]
- Css
- Description
- width/height
- There will be not any fixed max-width/max-height values as the resize part will handle from VD
[Code logic]
- Code
- Description
- getVdConfig('footer-logo').then((res) => { if (res.data.code == 200 && res.data.data !== null) { this.footerLogo = res.data.data; } }).catch(ex => { console.log(ex); });
- getVdConfig- Is used to get the changes details from VD like style,src,alt and sets the same to Logo in front end.
Import getVdConfig from webservices.js , initialize footerLogo variable to null in data return property like footerLogo: null
-> Social Icon
[Attributes]
- Attributes
- Description
- vd-node="socialicon"
- This is used to identify the type of vd-node
- vd-name="brandname"
- This is used for identifying the type of social icon name like.
Ex- vd-name="twitter" - rel=’’”
- This attribute is used for set target=’_blank’ dynamically.
ex-rel="noopener noreferrer external"]
Note- This to be added to all external links/the url that will open in another tab.
In webservice.js we have a selector to set target blank.
$(function() { $('a[rel="noopener noreferrer external"]').attr('target', '_blank'); })
Note- The html design will remain the same for template ul>li>a>i structure.
-> Buttons
Ex-

[Attributes]
- Attributes
- Description
- vd-node="button"
- Add this attribute to the all the dynamic buttons present
-> Static Link [ That doesn't have any dynamic event/action]
Ex-

[Attributes]
- Attributes
- Description
- vd-node="static-link"
- Add this attribute to the all the <a vd-node="static-link" href="javascript:void(0);"></a>
-> Disable click in vd
Ex-
[Attributes]
- Attributes
- Description
- class="disable-in-vd vd-no-navigation"
- Add any one of this class as default to the parent element of the button tag or the element which no click event to be off while editing from vd.
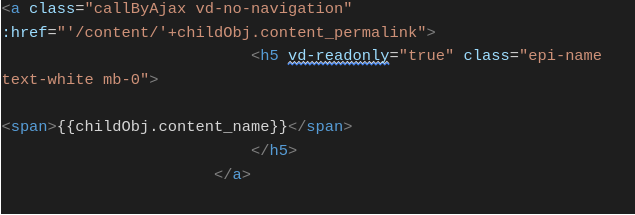
-> Read only[Dynamic Binding element]
Ex-

[Attributes]
- Attributes
- Description
- vd-readonly=’true’
- This attribute refers that the element can not be deleted / edited via VD.
-> Style only[Dynamic Binding element]
Ex-

[Attributes]
- Attributes
- Description
- vd-node="styleOnly"
vd-node=’text’
vd-node=’dynButton’ - These attributes indicate that only style related changes will amend from vd.[span,li,ol,em,i,div] tags other than [h1-h6,p] tag.
Also this applies to the button that has click function associated to it.
Any one attribute is fine we have kept multiple options for future usage.
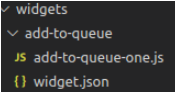
Widget Structure
- Components/widgets reside in resources/views/widgets directory.
- When a customer choose a template then the complete widget directory copy to that customers local directory.
- Components present in the widgets folder have different purposes,functionality and UI.
- Each component can have different variants,each variant itself a js file.
- Each component variant file name should be <componentname>-<variantcount>.js.
- Component variant name always be the same as component variant file name only replace the hyphen with underscore.
- If the parent component contains any child component, the import path will always be relative and start from the folder widgets.
- The component template should start and end with vd-component tag.vd-component element will have
- class property with value vd and component file name
- Type property with value component file name
- All the labels passed from the pages should be encoded in vd-component-param tag inside the widget with the property v-html and i18n function to support multilingual.
- Child components which are injected in a parent component will use the parent id along with its own alias and count as an identifier.
- Child components will take the parameters from the parent component.
- Frequently used functions file path
- resources/views/assets/js/i18n.js have function i18n for language translation.
- resources/views/assets/js/webservice-url.js have functions getBaseUrl for apigateway, getRootUrl for url upto customers local directory and getAssetUrl for url upto assets folder.
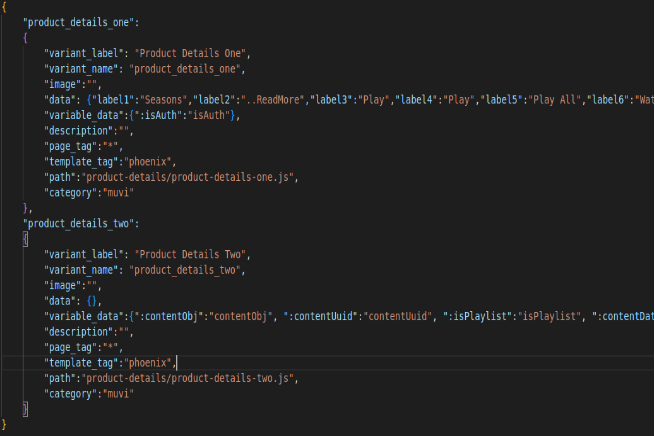
- Each component variant should be listed in the respective widget.json file.Widget json file will have the below data.
- variant_label:It is like the title/label of the variant.
- variant_name:Name of the variant that is added in the js file.
- image:image name which is shows the UI of the variant and images are stored in assets/img folder
- data:Data contains the json format of all the parameters that are being passed to the component except the id
- variable_Data:Except label and id all should be in the variable _data in json format.These are the data which are like variables that we are passing as parameter to the component
- description:Description of the variant which is optional
- page_tag:This says that for which page this is component is applicable.For all page the value is * and for no page the value is blank ””.
- template_tag:This says for which template it is applicable.For all template the value is * .
- path:Path value is relative to the widgets folder.
- category:Value is static .i.e;“muvi”


New widget adding process
Widget is nothing but a combined script of ui and functionality.If we think the script can be used in more than one page then we will make it as a component/widget which can be reused.
- Add a folder inside widgets/
- Put your vue component file in that folder
- To include the widget to a specific page suppose in the home page, create a home folder inside pages. Add two files inside this, one is home.php and home.js.
- Home.php file will have the vue component,parameters that we want to pass to the component and include script of home.js
- Home.js fill will import the required components and mount with the container
Example code for Widget
Home.php
                  <div id=”app”>

                  <purchase_history_one
                      label1="Purchase History"
                      label2="Receipt"
                      label3="No data found"
                  />
                  </div>

                  <script src="pages/home/home.js" type="module"></script>
Home.js
 import purchase_history_one from './../../widgets/purchase-history/purchase-history-one.js';
 Var components={purchase_history_one:purchase_history_one};
 const app = Vue.createApp({
 components:components,
 });
 app.mount("#app ");
Here purchase-history-one is the widget present in widgets/purchase-history Label1, Label2, Label3, …etc are the variable values passed to the widget.
Declaring widget template
template:
`<vd-component class="vd purchase-history-one" type="purchase-history-one"><div class="row">
<div class="col-xs-12 col-sm-12 col-md-12 col-lg-12 col-xl-12">
<h1 class="dashboard-heading white-color mbottom-020">
<vd-component-param type="label1" v-html=”i18n($attrs['label1'])”></vd-component-param>
</h1>
</div>
</div>
</vd-component>`
Component template should start and end with vd-component tag with
class="<vd component-name>" type=”<component name>”For example:
<vd-component class=”vd purchase-history-one” type="purchase-history-one">All variable from page will be get used in widget in below format
<vd-component-param type="label1"v-html=”i18n($attrs['label1'])”></vd-component-param>
How to use any API into Specific page
If you want to use or want to integrate any APIs from MUVI platform or any third party platform into your specific page then you can do it via writing some lines of code into BYOD editor and save that page code. After that you can check the output into your main website via navigating to a particular page.
Where to put and How to Put
For example; If you wish to call any API into About Us page then I will goto BYOD editor then open pages/about/about.php file and insert the code as shown below:

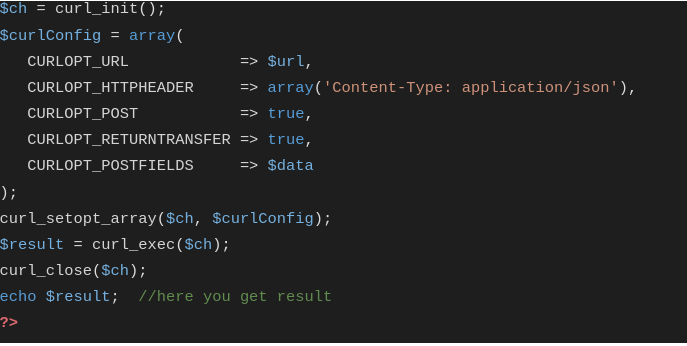
As you can see in the above example; in which I have used CURL for PHP language to make an API call to fetch some data from a dummy URL.
There are so many other ways you make an API call which supported by MUVI BYOD and listed below:
- CURL
- XMLHttpRequest (new XMLHttpRequest())
- Fetch (fetch(api call url).then({}))
- Axios (axios.get(), axios.post(), etc.)
- jQuery ($.ajax())
Methods which are allows/supported to use during API integration are:
- POST
- GET