Whether you are managing high-end studio broadcasts or need to live video streaming directly from mobile devices, you must be aware of the streaming tools available for all levels of production, whether you host public gaming events or securely live … Continue reading →
Whether you are managing high-end studio broadcasts or need to live video streaming directly from mobile devices, you must be aware of the streaming tools available for all levels of production, whether you host public gaming events or securely live stream funerals for remote viewers.
One software encoder that can work for all levels of live streams from amateur to professional-grade is OBS Studio or Open Broadcast Software. OBS studio is the most widely used encoder for video recording, and it pairs seamlessly with professional live audio streaming software. This blog will give you a detailed step-by-step video live streaming guide using Muvi Live Server and OBS.
What is OBS Studio Used For?
OBS Studio is a free and open broadcaster live stream software that is used for live streaming. It allows you to broadcast live video to various live video streaming platform and streaming services. It also helps you multi stream on various platforms simultaneously. It allows you to add video and audio sources like webcam, microphone, and other inputs to the stream.
Get the best live streaming experience for your platform with Muvi Live!
Setting Up OBS – The Detailed Process
Things to Keep in Mind before Starting:
Muvi Live supports live streaming through camera using RTMP feed
If you are using the free trial, only 60 minutes of live streaming will be allowed
While standard RTMP feeds have approximately 30 seconds of latency, Muvi Live can also be configured as a Low Latency Streaming Solution for real-time delivery.
Detailed Step-By-Step Guide to Live Stream with OBS and Muvi Live
Are you looking for how to use OBS for live streaming? Here are steps to follow:
Once your 14 days free trial is over, you will have to purchase the subscription to Muvi Live.
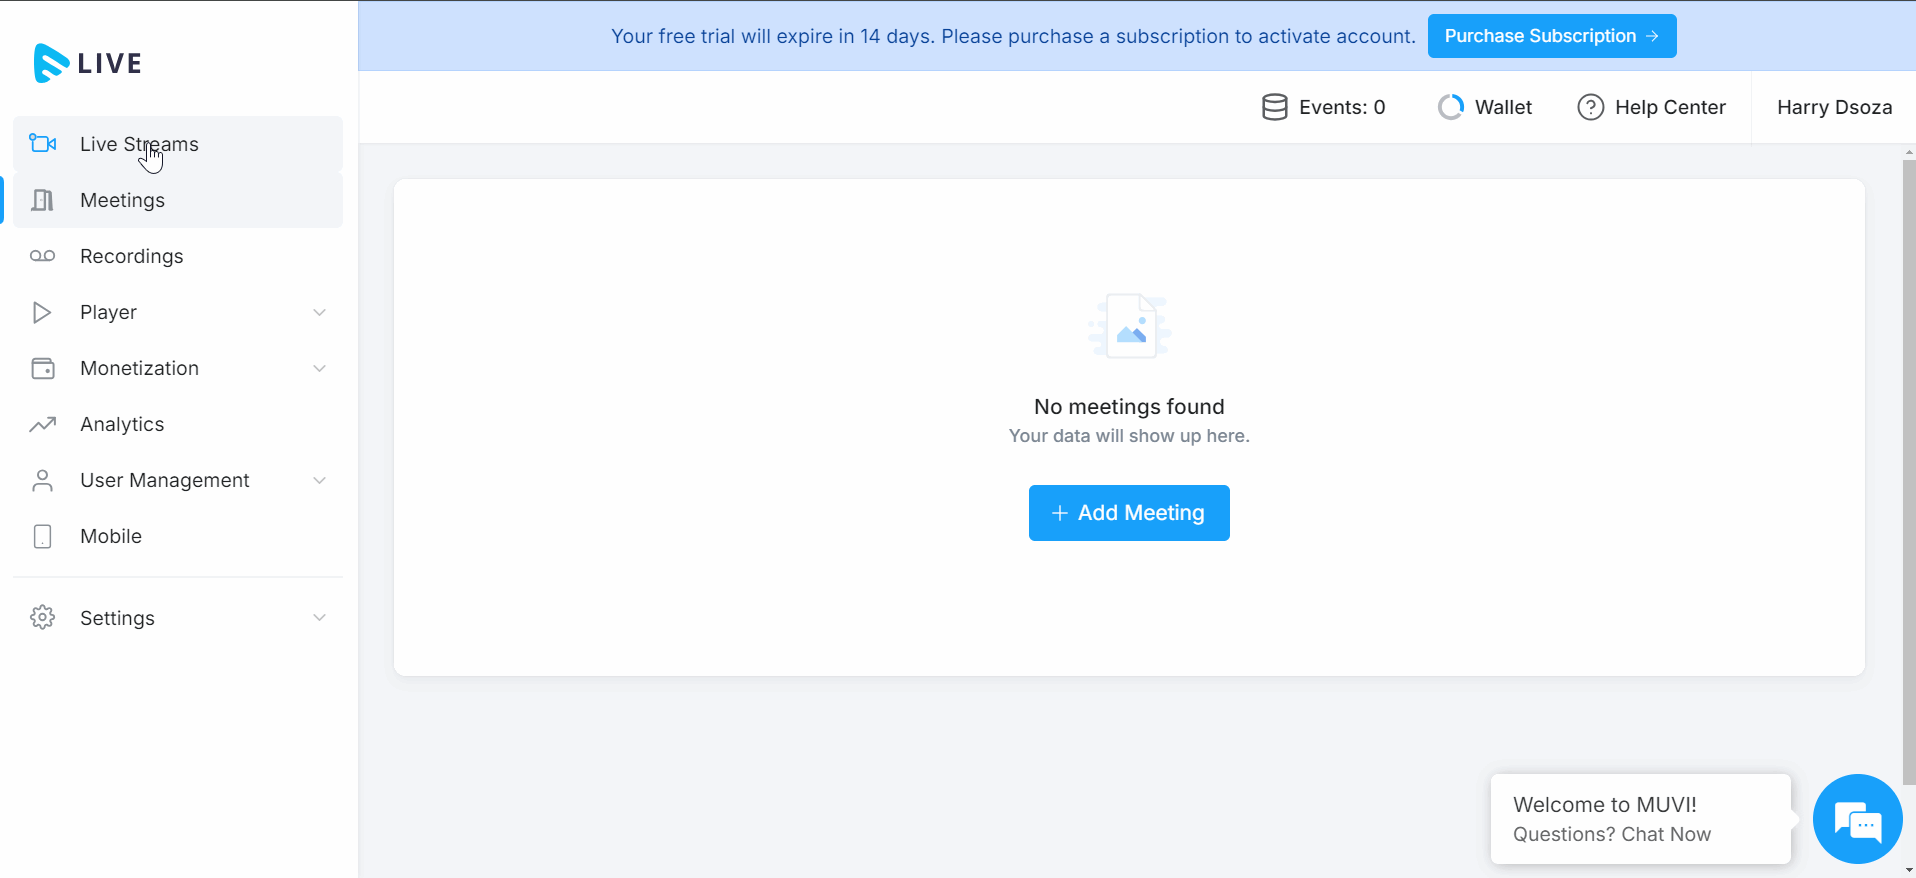
Step 2: Adding Live Stream
To add a live stream, click on “Manage Live Stream” –> “Add Live Stream”.
Give “Stream Name” and “Description” about the live stream
After saving this information, your live event will be created
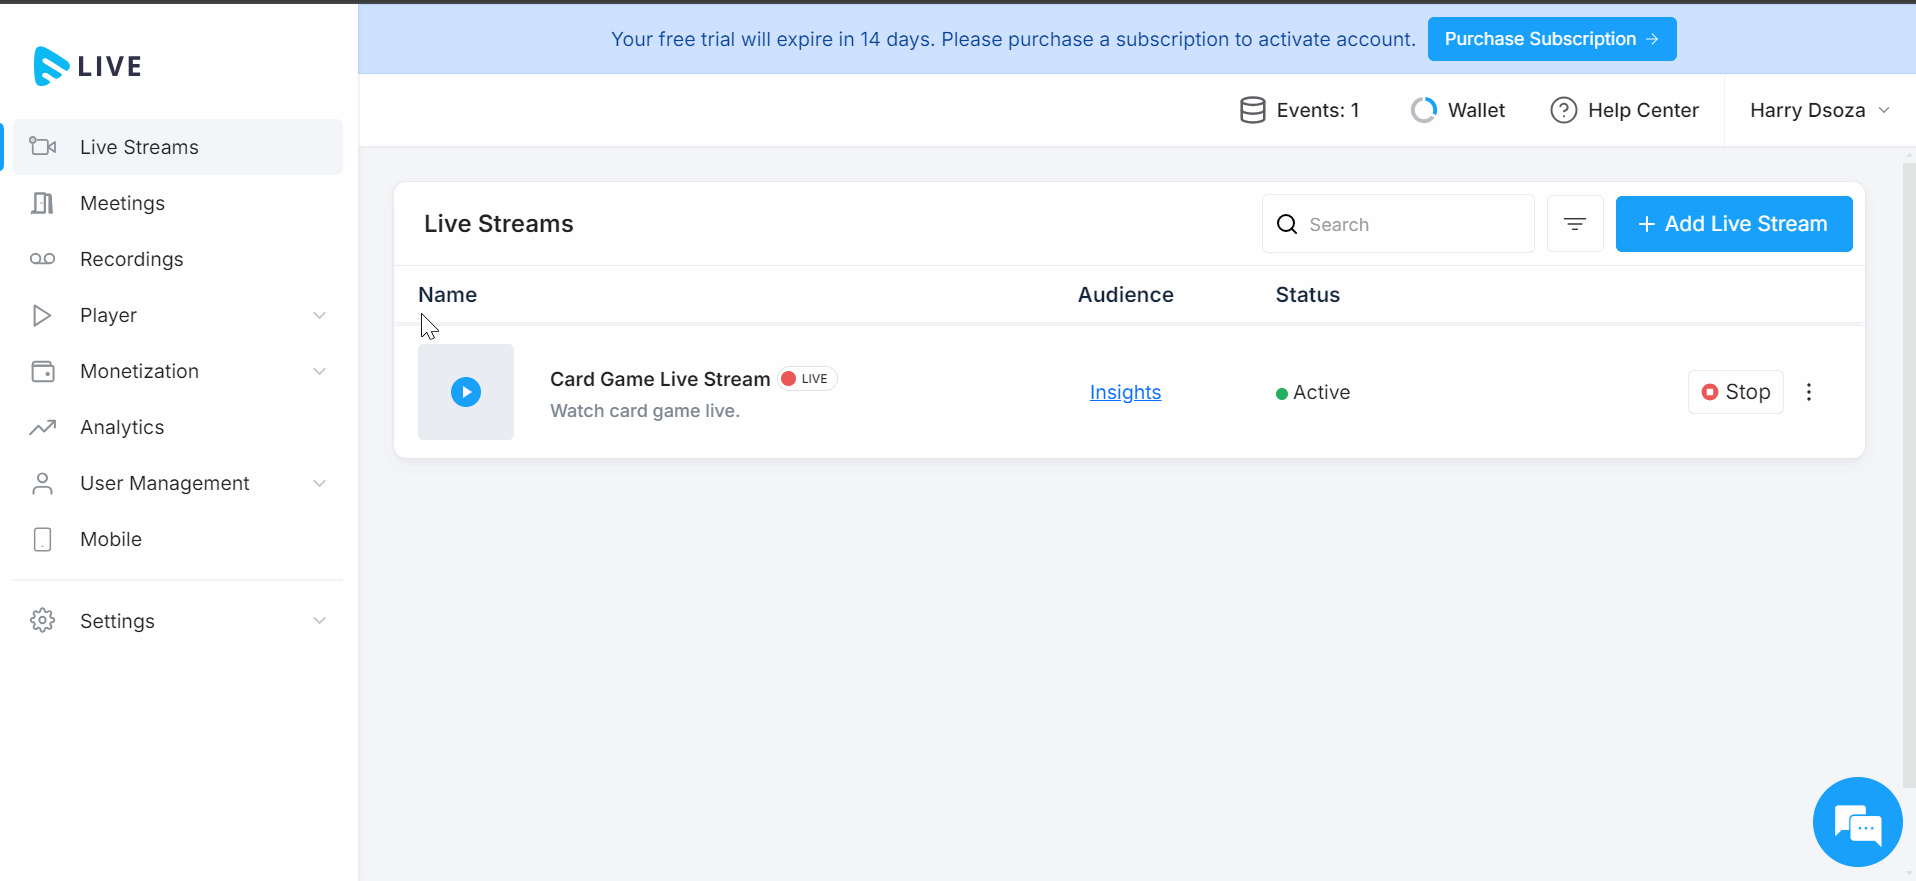
Step 3: Starting the Live Stream
To start a live stream, click on “Start Stream”
Once the live stream starts, you will get “Stream Info” that comprises Stream URL and Stream Key. You need to add the Stream Key and Stream URL in OBS
Note: HLS feature is only available with a subscription.
Step 4: Configuring OBS
To Live Stream with OBS, you have to first download and install OBS broadcast studio in your system. To download OBS, click here.
Open OBS live streaming and go to the Sources section, click + to add a new source.
Select “Select Video Capture Device” from the list and click on “OK” to add the capture device.
Navigate to “File” –>” Settings” –>” Stream” and from the drop-down, select “Custom”.
Type the “Server” and “Stream Key” obtained from Muvi Live Server
Click on “Apply” and “OK”.
Click on “Start Streaming” on the bottom right corner of OBS to start the live stream
Step 5: Generate Live Stream via HLS
When you start live streaming using Muvi Live, an HLS output URL is generated to ensure enterprise-grade low latency streaming to your audience. All you have to do is click on “Stream Info” to get the URL. Existing Muvi customers can add this URL to live stream content in the CMS.
Step 6: Publishing the Live Stream
To generate an embed code for the live event, all you have to do is, click on “Stream Info” to get the URL. You can embed this link into your website or a scalable live streaming app to get live stream output in the designated space.
OBS Live streaming at first glance might seem intimidating, but with this step-by-step guide, we hope you will quickly realize how easy and simple it is to use this encoding software. Coupled with Muvi Live, broadcasting professional video streams, hosting live streaming meetings, or utilizing white-label live audio streaming platforms is no longer an ordeal and can be set up in a matter of a few minutes.
Why don’t you take a 14-Day Free Trial of Muvi Live to partner with a live streaming provider capable of securely delivering stunning ultra low-latency buffer-free live streams!
FAQs
OBS Studio is a free and open broadcaster live stream software that is used for live streaming. It allows you to broadcast live video to various live streaming platforms and streaming services.
Yes, OBS Studio can be used for professional streaming.
Open OBS live streaming and go to the Sources section, click + to add a new source.
Select “Select Video Capture Device” from the list and click on “OK” to add the capture device.
Navigate to “File” –>” Settings” –>” Stream” and from the drop-down, select “Custom”.
Type the “Server” and “Stream Key” obtained from Muvi Live Server
Click on “Apply” and “OK”.
Click on “Start Streaming” on the bottom right corner of OBS to start the live stream
Sreejata is the Manager for Muvi’s Content Marketing unit with strong expertise and experience in Video Streaming Technology. By week Sreejata spends her time in the corporate world of Muvi, but on weekends she likes to take short hiking trips, watch movies and read travelogues.


Add your comment